Kodak LS755 User's Guide - Page 48
Using the Kodak Photo Frame Dock, Photo Frame display settings
 |
View all Kodak LS755 manuals
Add to My Manuals
Save this manual to your list of manuals |
Page 48 highlights
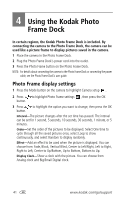
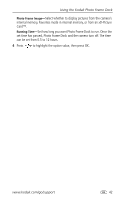
4 Using the Kodak Photo Frame Dock In certain regions, the Kodak Photo Frame Dock is included. By connecting the camera to the Photo Frame Dock, the camera can be used like a picture frame to display pictures saved in the camera. 1 Place the camera in the Photo Frame Dock. 2 Plug the Photo Frame Dock's power cord into the outlet. 3 Press the Photo Frame button on the Photo Frame Dock. NOTE: For details about connecting the camera to the Photo Frame Dock or connecting the power cable, see the Photo Frame Dock's user guide. Photo Frame display settings 1 Press the Mode button on the camera to highlight Camera setup . 2 Press to highlight Photo Frame settings , then press the OK button. 3 Press to highlight the option you want to change, then press the OK button. Interval-The picture changes after the set time has passed. The interval can be set for 1 second, 5 seconds, 10 seconds, 30 seconds, 1 minute, or 5 minutes. Order-Set the order of the pictures to be displayed. Select One time to cycle through all the saved pictures once, select Loop to show continuously, and select Random to display randomly. Effect-Add an effect to be used when the picture is displayed. You can choose from: Fade, Block, Vertical Blind, Center to Left/Right, Left to Right, Right to Left, Center to Up/Bottom, Up to Bottom, Bottom to Up. Display Clock-Show a clock with the picture. You can choose from Analog clock and Big/Small Digital clock. 41 www.kodak.com/go/support
-
 1
1 -
2
-
3
-
4
-
5
-
6
-
7
-
8
-
9
-
10
-
11
-
12
-
13
-
14
-
15
-
16
-
17
-
18
-
19
-
20
-
21
-
22
-
23
-
24
-
25
-
26
-
27
-
28
-
29
-
30
-
31
-
32
-
33
-
34
-
35
-
36
-
37
-
38
-
39
-
40
-
41
-
42
-
 43
43 -
 44
44 -
 45
45 -
 46
46 -
 47
47 -
 48
48 -
 49
49 -
 50
50 -
 51
51 -
 52
52 -
 53
53 -
54
-
55
-
56
-
57
-
58
-
59
-
60
-
61
-
62
-
63
-
64
-
65
-
66
-
67
-
68
-
69
-
70
-
71
-
72
-
73
-
74
-
75
-
76
-
77
-
78
-
79
-
80
 |
 |
