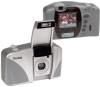
Kodak Preview User Manual - Page 9
Setting the date and time - data
 |
UPC - 041771588700
View all Kodak Preview manuals
Add to My Manuals
Save this manual to your list of manuals |
Page 9 highlights
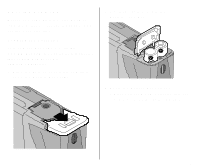
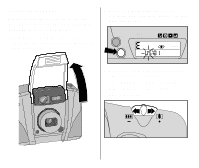
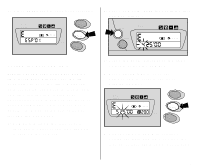
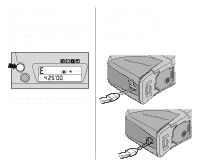
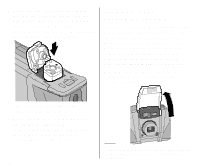
4. Press ENTER (16) to save your selection. EXP LEFT AUTO ISO SELECT ENTER MODE 2. Press and hold DATE (25) until the first number "blinks." DATE EXP LEFT TITLE AUTO Setting the date and time Traditional cameras print date and/or time information directly onto the film. Your camera uses the film's magnetic data-recording capability to record date and time information, which your photofinisher can imprint on the back of your photographs. This camera has a quartz clock and automatic calendar through the year 2099. 1. Completely lift up the lens cover/ flash (2) to uncover the lens (7) and to turn on the camera. 3. Press the zoom dial (13) to the right or left to select the number. 4. Press ENTER (16) to save the number and to actuate the next blinking number. EXP LEFT AUTO ISO SELECT ENTER MODE 5. Repeat steps 3 and 4 to continue setting the date and time or close the lens cover/flash (2) to end your selection. 7
-
 1
1 -
2
-
3
-
 4
4 -
 5
5 -
 6
6 -
 7
7 -
 8
8 -
 9
9 -
 10
10 -
 11
11 -
 12
12 -
 13
13 -
 14
14 -
15
-
16
-
17
-
18
-
19
-
20
-
21
-
22
-
23
-
24
-
25
-
26
-
27
-
28
-
29
-
30
-
31
-
32
-
33
-
34
-
35
-
36
-
37
-
38
-
39
-
40
-
41
-
42
-
43
-
44
-
45
-
46
-
47
-
48
-
49
-
50
-
51
-
52
-
53
-
54
-
55
-
56
-
57
-
58
-
59
-
60
-
61
-
62
-
63
-
64
-
65
-
66
-
67
-
68
-
69
-
70
-
71
-
72
-
73
-
74
-
75
-
76
-
77
-
78
-
79
-
80
-
81
-
82
-
83
-
84
-
85
-
86
-
87
-
88
-
89
-
90
-
91
-
92
-
93
-
94
-
95
-
96
-
97
-
98
-
99
-
100
-
101
-
102
-
103
-
104
-
105
-
106
 |
 |
