Konica Minolta bizhub 4750 bizhub 4750/4050 Scan Functions User Guide - Page 92
Zoom Prescan icon
 |
View all Konica Minolta bizhub 4750 manuals
Add to My Manuals
Save this manual to your list of manuals |
Page 92 highlights
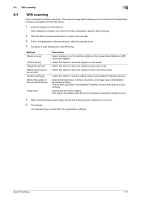
9.3 TWAIN scanning 9 Settings [Image size] [Rotation] [Auto Deskew] Auto Crop icon Zoom Prescan icon Mirror Image icon Gradation Reverse icon Clear icon [Before] / [After] (RGB) [Width] / [Height] [Save] [Load] [Default] Description Displays the data size of the image to be scanned. Specify the orientation of the image to be scanned. Selecting the [Rotate back side] check box rotates the back side 180 degrees to scan the original (this setting is available when [Paper source] is set to [ADF (2-sided)]). Specify whether or not to automatically adjust the inclination of the original. Click this icon to automatically detect the position of the original displayed in the preview area and draw a crop frame that fits the original. Click this icon to rescan the selected range in the preview area and display it in the entire preview area. Click this icon to reverse the left and right sides of the preview image. Click this icon to reverse the color of the preview image. Clears the preview image. If you move the cursor on the preview image, the image at the cursor position is displayed with the tone before and after the adjustment. Displays the width and height of the selected range in the preview area. Click this button to save the current setting as a configuration file (dat file). Click this button to scan the saved configuration file (dat file). Click this button to restore all settings to the defaults. 6 Click [Scan]. The desired image is imported to the application software. [Scan Functions] 9-6
-
 1
1 -
2
-
3
-
4
-
5
-
6
-
7
-
8
-
9
-
10
-
11
-
12
-
13
-
14
-
15
-
16
-
17
-
18
-
19
-
20
-
21
-
22
-
23
-
24
-
25
-
26
-
27
-
28
-
29
-
30
-
31
-
32
-
33
-
34
-
35
-
36
-
37
-
38
-
39
-
40
-
41
-
42
-
43
-
44
-
45
-
46
-
47
-
48
-
49
-
50
-
51
-
52
-
53
-
54
-
55
-
56
-
57
-
58
-
59
-
60
-
61
-
62
-
63
-
64
-
65
-
66
-
67
-
68
-
69
-
70
-
71
-
72
-
73
-
74
-
75
-
76
-
77
-
78
-
79
-
80
-
81
-
82
-
83
-
84
-
85
-
86
-
 87
87 -
 88
88 -
 89
89 -
 90
90 -
 91
91 -
 92
92 -
 93
93 -
 94
94 -
 95
95 -
 96
96 -
 97
97 -
98
-
99
-
100
 |
 |