Konica Minolta bizhub 501 bizhub 361/421/501 Fax Driver Operations User Manual - Page 18
Installing the fax driver using the Add Printer Wizard - driver windows xp
 |
View all Konica Minolta bizhub 501 manuals
Add to My Manuals
Save this manual to your list of manuals |
Page 18 highlights
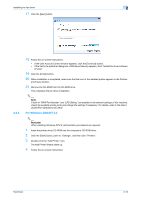
Installing the fax driver 2 2.3 2.3.1 Installing the fax driver using the Add Printer Wizard As an example, the following describes the installation procedure via a network connection (LPR/Port9100). When using the LPR/Port9100 printing, specify the port during the printer driver installation process. ! Detail For installation procedures via other network connections (SMB, IPP/IPPS and Web Service print), refer to the User's Guide [Print Operations (IC-207)]. Settings of this machine Before using this machine in a network environment, the network settings must be specified for this machine. TCP/IP setting for this machine Specify the IP address on TCP/IP Setting of this machine. ! Detail For details on specifying the IP address of this machine, refer to the User's Guide [Network Administrator]. 2.3.2 Specifying the RAW port number for this machine To use Port9100 printing, enable the RAW port number (9100 at default), on the "TCP/IP Setting" for this machine. ! Detail For details on specifying the RAW port number of this machine, refer to the User's Guide [Network Administrator]. LPD setting for this machine To use LPR printing, enable LPD print on "LPD Setting" of this machine. ! Detail For details on LPD setting of this machine, refer to the User's Guide [Network Administrator]. For Windows XP/Server 2003 2 Reminder When installing on Windows XP/Server2003, administrator permissions are required. 1 Insert the printer driver CD-ROM into the computer's CD-ROM drive. 2 Click the [Start] button, and then click "Printers and Faxes". - If "Printers and Faxes" does not appear in the Start menu, open the Control Panel from the Start menu, select "Printers and Other Hardware", and then select "Printers and Faxes". Fax Driver 2-7
-
 1
1 -
2
-
3
-
4
-
5
-
6
-
7
-
8
-
9
-
10
-
11
-
12
-
 13
13 -
 14
14 -
 15
15 -
 16
16 -
 17
17 -
 18
18 -
 19
19 -
 20
20 -
 21
21 -
 22
22 -
 23
23 -
24
-
25
-
26
-
27
-
28
-
29
-
30
-
31
-
32
-
33
-
34
-
35
-
36
-
37
-
38
-
39
-
40
-
41
-
42
-
43
-
44
-
45
-
46
-
47
-
48
-
49
-
50
-
51
-
52
-
53
-
54
-
55
-
56
-
57
-
58
-
59
-
60
-
61
-
62
-
63
-
64
-
65
-
66
-
67
 |
 |
