Konica Minolta bizhub C754 bizhub C654/C754 Control Panel User Guide - Page 21
Viewing Current Job or Job History, Description
 |
View all Konica Minolta bizhub C754 manuals
Add to My Manuals
Save this manual to your list of manuals |
Page 21 highlights
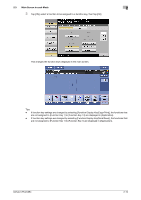
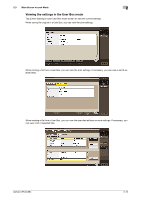
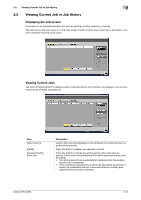
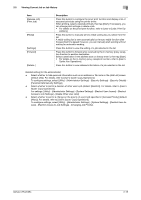
2.5 Viewing Current Job or Job History 2 Item [Release Job] (Print Job) [Redial] [Settings] [Forward] [Details..] Description Press this button to configure the proof print function and display a list of executed print jobs using the printer driver. When printing, select a desired print job, then tap [Start]. If necessary, you can change print settings or delete a job. • For details on the proof print function, refer to [User's Guide: Print Op- erations]. Press this button to manually send a redial waiting fax you select from the list. A redial waiting fax is sent automatically by the auto redial function after the specified time lapsed; however, you can manually start sending without waiting for automatic sending. Press this button to view the setting of a job selected in the list. Press this button to forward a fax received by the in-memory proxy reception function to another destination. Select a destination in the address book or directly enter it, then tap [Start]. • For details on the in-memory proxy reception function, refer to [User's Guide: Fax Operations]. Press this button to view detailed information of a job selected in the list. Related setting (for the administrator) - Select whether to hide personal information such as an address or file name in the [Job List] screen (default: [No]). For details, refer to [User's Guide: Copy Operations]. To configure settings, select [Utility] - [Administrator Settings] - [Security Settings] - [Security Details] [Personal Data Security Settings]. - Select whether to permit a deletion of other user's job (default: [Restrict]). For details, refer to [User's Guide: Copy Operations]. For settings: [Utility] - [Administrator Settings] - [System Settings] - [Restrict User Access] - [Restrict Access to Job Settings] - [Delete Other User Jobs] - Select whether to permit a change on the priority of a print job specified in [Increase Priority] (default: [Allow]). For details, refer to [User's Guide: Copy Operations]. To configure settings, select [Utility] - [Administrator Settings] - [System Settings] - [Restrict User Access] - [Restrict Access to Job Settings] - [Changing Job Priority]. bizhub C754/C654 2-15
-
 1
1 -
2
-
3
-
4
-
5
-
6
-
7
-
8
-
9
-
10
-
11
-
12
-
13
-
14
-
15
-
 16
16 -
 17
17 -
 18
18 -
 19
19 -
 20
20 -
 21
21 -
 22
22 -
 23
23 -
 24
24 -
 25
25 -
 26
26 -
27
-
28
-
29
-
30
-
31
-
32
-
33
-
34
-
35
-
36
-
37
-
38
-
39
-
40
-
41
-
42
-
43
-
44
-
45
-
46
-
47
-
48
-
49
 |
 |
