Konica Minolta bizhub PRESS C71cf bizhub PRESS C71cf Quick Guide - Page 71
Install the, If the position of the, is changed in step 2, place it back in place., tension roller 1
 |
View all Konica Minolta bizhub PRESS C71cf manuals
Add to My Manuals
Save this manual to your list of manuals |
Page 71 highlights
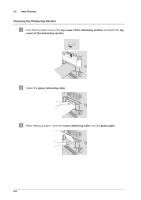
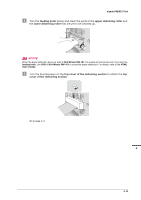
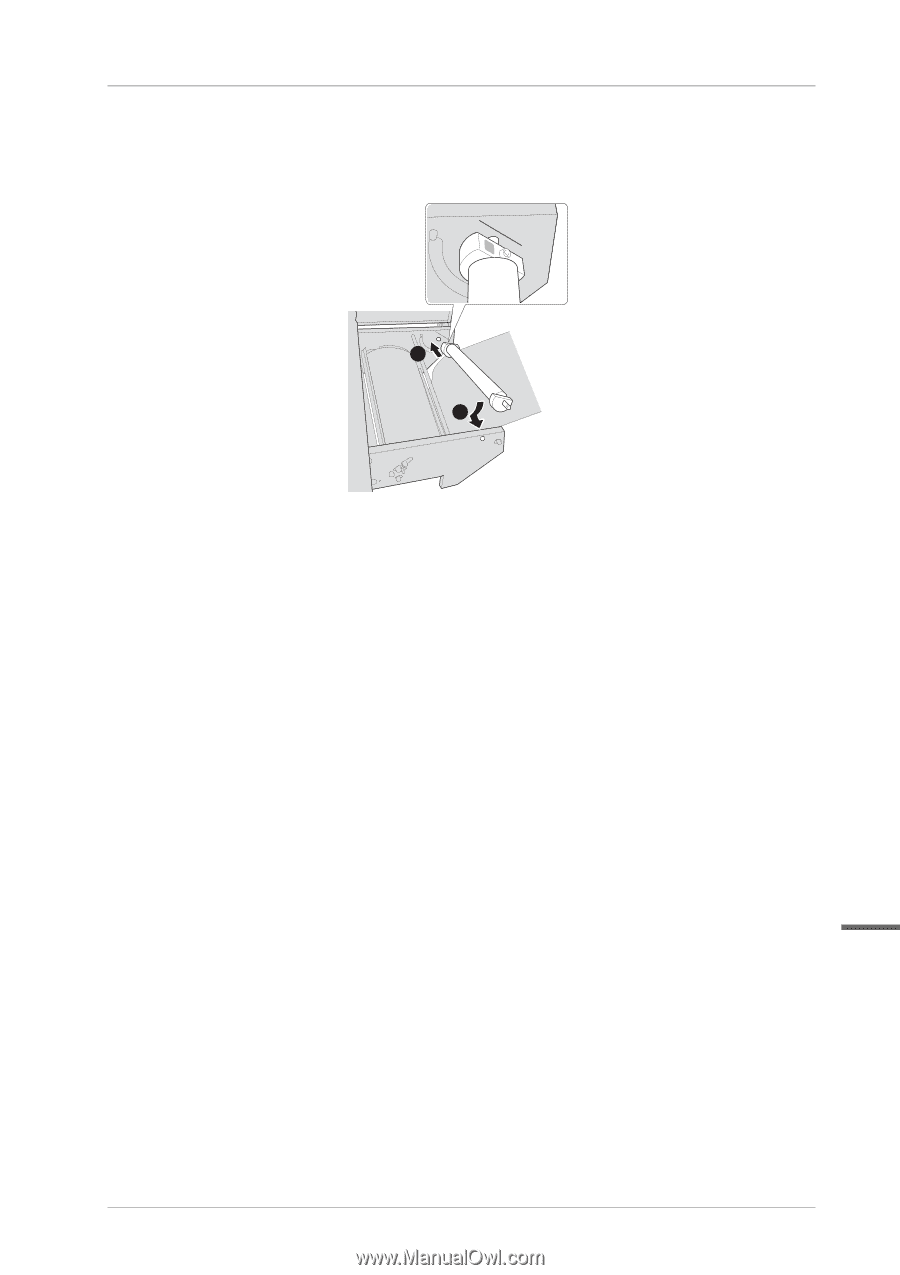
bizhub PRESS C71cf * Install the tension roller 1. Insert the rear shaft of the tension roller 1 into the hole, align the angle of the media guide to the scratch line of the guide plate in the back side, then insert the front shaft into the hole. 1 2 Make sure that it clicks when attaching. + If the position of the tension roller 2 is changed in step 2, place it back in place. Go to page 4-9. 4 4-8
-
 1
1 -
2
-
3
-
4
-
5
-
6
-
7
-
8
-
9
-
10
-
11
-
12
-
13
-
14
-
15
-
16
-
17
-
18
-
19
-
20
-
21
-
22
-
23
-
24
-
25
-
26
-
27
-
28
-
29
-
30
-
31
-
32
-
33
-
34
-
35
-
36
-
37
-
38
-
39
-
40
-
41
-
42
-
43
-
44
-
45
-
46
-
47
-
48
-
49
-
50
-
51
-
52
-
53
-
54
-
55
-
56
-
57
-
58
-
59
-
60
-
61
-
62
-
63
-
64
-
65
-
 66
66 -
 67
67 -
 68
68 -
 69
69 -
 70
70 -
 71
71 -
 72
72 -
 73
73 -
 74
74 -
 75
75 -
 76
76 -
77
-
78
-
79
-
80
-
81
-
82
-
83
-
84
-
85
-
86
-
87
-
88
-
89
-
90
-
91
-
92
-
93
-
94
-
95
-
96
-
97
-
98
-
99
-
100
-
101
-
102
-
103
-
104
-
105
-
106
-
107
-
108
-
109
-
110
-
111
-
112
-
113
-
114
-
115
-
116
-
117
-
118
-
119
-
120
-
121
-
122
-
123
-
124
-
125
-
126
-
127
-
128
-
129
-
130
-
131
-
132
-
133
-
134
-
135
-
136
-
137
-
138
-
139
-
140
-
141
-
142
-
143
 |
 |
4-8
bizhub PRESS C71cf
4
I
Install the
tension roller 1
.
Insert the rear shaft of the
tension roller 1
into the hole, align the angle of the
media guide
to the scratch
line of the
guide plate
in the back side, then insert the front shaft into the hole.
Make sure that it clicks when attaching.
J
If the position of the
tension roller 2
is changed in step 2, place it back in place.
Go to page 4-9.
1
2