Konica Minolta bizhub PRO 1100 bizhub PRO 1100 Daily Maintenance Guide - Page 29
Checking the reference position of the print side
 |
View all Konica Minolta bizhub PRO 1100 manuals
Add to My Manuals
Save this manual to your list of manuals |
Page 29 highlights
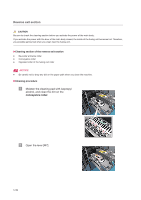
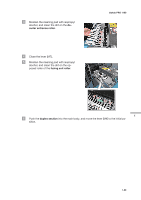
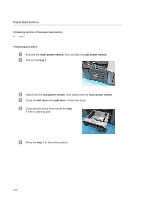
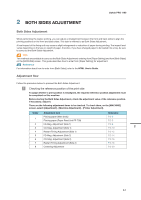
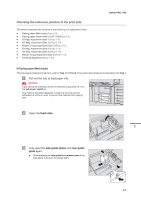
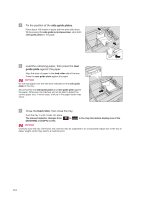
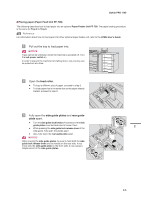
Checking the reference position of the print side This section describes the contents of the following nine adjustment items. - Placing paper (Main body) (Page 2-3) - Placing paper (Paper Feed Unit PF-709) (Page 2-5) - FD-Mag. Adjustment (Side 1) (Page 2-8) - CD-Mag. Adjustment (Side 1) (Page 2-10) - Restart Timing Adjustment (Side 1) (Page 2-12) - FD-Mag. Adjustment (Side 2) (Page 2-14) - CD-Mag. Adjustment (Side 2) (Page 2-16) - Restart Timing Adjustment (Side 2) (Page 2-18) - Centering Adjustment (Page 2-20) bizhub PRO 1100 )Placing paper (Main body) The same paper loading procedure is used for Tray 1 and Tray 2. This section describes how to load paper into Tray 1. 1 Pull out the tray to load paper into. NOTICE Trays cannot be withdrawn when the machine is powered off. Turn the sub power switch on. This machine has been designed so that only one tray can be withdrawn at a time in order to prevent the machine from tipping over. 2 Open the feed roller. 2 3 Fully open the side guide plates and rear guide plate apart. - While pressing the side guide lock release lever of the side guide, fully open the plates apart. 2-3
-
 1
1 -
2
-
3
-
4
-
5
-
6
-
7
-
8
-
9
-
10
-
11
-
12
-
13
-
14
-
15
-
16
-
17
-
18
-
19
-
20
-
21
-
22
-
23
-
 24
24 -
 25
25 -
 26
26 -
 27
27 -
 28
28 -
 29
29 -
 30
30 -
 31
31 -
 32
32 -
 33
33 -
 34
34 -
35
-
36
-
37
-
38
-
39
-
40
-
41
-
42
-
43
-
44
-
45
-
46
-
47
-
48
-
49
-
50
-
51
-
52
-
53
-
54
-
55
-
56
-
57
-
58
-
59
-
60
-
61
-
62
-
63
-
64
-
65
-
66
-
67
-
68
-
69
-
70
-
71
 |
 |
