Kyocera FS-8000CDN IB-2x Quick Configuration Guide Rev 2.2 - Page 7
Windows Printing via TCP/IP
 |
View all Kyocera FS-8000CDN manuals
Add to My Manuals
Save this manual to your list of manuals |
Page 7 highlights
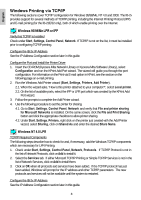
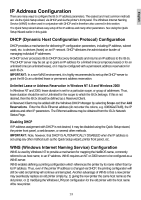
English Windows Printing via TCP/IP The following sections cover TCP/IP configuration for Windows 95/98/Me, NT 4.0 and 2000. The IB-2x provides support for several methods of TCP/IP printing, including the Internet Printing Protocol (IPP) and E-mail printing (for the IB-21E/22 only), both of which enable printing over the Internet. Windows 95/98/Me LPR or IPP Verify that TCP/IP is Installed Check under Start, Settings, Control Panel, Network. If TCP/IP is not on the list, it must be installed prior to configuring TCP/IP printing. Configure the IB-2x IP Address See the IP Address Configuration section later in this guide. Configure the Port and Install the Printer Driver 1. Insert the CD-ROM (Kyocera Mita Network Library or Kyocera Mita Software Library), select Configuration and run the KPrint Add Port wizard. The wizard will guide you through the port configuration. For information on the Print via E-mail option in KPrint, see the section on the following page on e-mail printing. 2. Run the Windows Add Printer wizard (Start, Settings, Printers, Add Printer). 2.1. When the wizard asks, "How is this printer attached to your computer?", select Local printer. 2.2. On the list of available ports, select the IPP or LPR port which was created by the KPrint Add Port wizard. 3. Follow the prompts to complete the Add Printer wizard. 4. Use the following procedure to set the printer for sharing. 4.1. Go to Start, Settings, Control Panel, Network and verify that File and printer sharing for Microsoft Networks is installed. On the same screen, click the File and Print Sharing button and click the appropriate checkbox to allow printer sharing. 4.2. Under Start, Settings, Printers, right click on the printer just created with the Add Printer wizard, select Sharing, click on Shared As and enter the desired Share Name. Windows NT 4.0 LPR TCP/IP Required Components The following steps describe how to check for and, if necessary, add the Windows TCP/IP components which are necessary for LPR Printing. 1. Check under Start, Settings, Control Panel, Network, Protocols. If TCP/IP Protocol is not in the list of Network Protocols, click on Add to install it. 2. Select the Services tab. If either Microsoft TCP/IP Printing or Simple TCP/IP Services is not in the list of Network Services, click on Add to install them. 3. Click on OK when all protocols and services have been added. If the TCP/IP protocol has just been added, Windows will prompt for the IP address and other TCP/IP parameters. The new protocols and services will not be available until the system is restarted. Configure the IB-2x IP Address See the IP Address Configuration section later in this guide. 8
-
 1
1 -
 2
2 -
 3
3 -
 4
4 -
 5
5 -
 6
6 -
 7
7 -
 8
8 -
 9
9 -
 10
10 -
 11
11 -
 12
12 -
13
-
14
-
15
-
16
-
17
-
18
-
19
-
20
-
21
-
22
-
23
-
24
-
25
-
26
-
27
-
28
-
29
-
30
-
31
-
32
-
33
-
34
-
35
-
36
-
37
-
38
-
39
-
40
-
41
-
42
-
43
-
44
-
45
-
46
-
47
-
48
-
49
-
50
-
51
-
52
-
53
-
54
-
55
-
56
-
57
-
58
-
59
-
60
-
61
-
62
-
63
-
64
-
65
-
66
-
67
-
68
-
69
-
70
-
71
-
72
-
73
-
74
-
75
-
76
-
77
-
78
-
79
-
80
-
81
-
82
-
83
-
84
-
85
-
86
-
87
-
88
-
89
-
90
-
91
-
92
-
93
-
94
-
95
-
96
-
97
-
98
-
99
-
100
-
101
-
102
-
103
-
104
-
105
-
106
-
107
-
108
-
109
-
110
-
111
-
112
-
113
-
114
-
115
-
116
-
117
-
118
-
119
-
120
-
121
-
122
-
123
-
124
-
125
-
126
-
127
-
128
-
129
-
130
-
131
-
132
-
133
-
134
-
135
-
136
-
137
-
138
-
139
-
140
-
141
-
142
-
143
-
144
-
145
-
146
-
147
-
148
-
149
-
150
-
151
-
152
-
153
-
154
-
155
-
156
-
157
-
158
-
159
-
160
-
161
-
162
-
163
-
164
-
165
-
166
-
167
-
168
-
169
-
170
-
171
-
172
-
173
-
174
-
175
-
176
-
177
-
178
-
179
-
180
-
181
-
182
-
183
-
184
-
185
-
186
-
187
-
188
-
189
-
190
-
191
-
192
-
193
-
194
-
195
-
196
-
197
-
198
-
199
-
200
-
201
-
202
-
203
-
204
-
205
 |
 |