Kyocera FS-8000CDN IB-2x Quick Configuration Guide Rev 2.2 - Page 8
Windows 95/98/Me, NT 4.0 and 2000 E-mail Printing, Windows 2000 Standard TCP/IP Printing
 |
View all Kyocera FS-8000CDN manuals
Add to My Manuals
Save this manual to your list of manuals |
Page 8 highlights
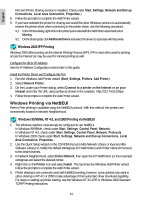
English Install the Printer Driver and Configure the Port 1. Insert the CD-ROM included with the printer (Kyocera Mita Software Library or Kyocera Mita Digital Library), then select the printer driver installation option from the main menu. 2. On the Printer Connection dialog, select Local. 3. On the Select a Printer Port dialog, click on the Add LPR Port button. 4. In the Name or address of server providing lpd: field, enter the IB-2x IP address. 5. In the Name of printer or print queue on that server: field, enter any desired port name, e.g. LPR1, and click on OK. 6. If the printer is to be shared, then on the appropriate wizard dialog select Shared and enter the desired share name. Select any other Windows versions which you would like to automatically receive the driver when connecting to this share. Windows 95/98/Me, NT 4.0 and 2000 E-mail Printing The IB-21E/22 offers a new function for e-mail printing. With this function, a print job can be e-mailed to a remote printer, e.g. over the Internet, using the standard print function in any Windows application. An IB-21E/22 configured for e-mail printing connects to an e-mail server via POP3 and retrieves emailed print jobs. For information on the setup procedure, see the POP3 and email setup procedure in the operating instructions (HTML) on the included CD-ROM (Kyocera Mita Network Library or Kyocera Mita Software Library). Once the IB-21E/22 is configured to retrieve e-mail, KPrint is used to create a port in Windows which directs print jobs to the printer via e-mail. After creation with KPrint, the port may be selected when adding a new printer with the Windows Add Printer wizard ("Local printer" is selected for ports created by KPrint). A common implementation is to create a shared printer on a Windows server and configure it to use the e-mail port created by KPrint to e-mail print jobs to a remote office printer. Users can then easily connect to the shared printer using only the Windows Add Printer wizard and send print jobs to the remote office. This offers an attractive alternative to faxing. Windows 2000 Standard TCP/IP Printing Configure the IB-2x IP Address See the IP Address Configuration section later in this guide. Install the Printer Driver and Configure the Port 1. Run the Windows Add Printer wizard (Start, Settings, Printers, Add Printer). 2. Select Local Printer and uncheck Automatically detect and install my Plug and Play printer. 3. Select Create a new port and choose Standard TCP/IP port from the drop down Type list. This will launch the Add Standard TCP/IP Printer Port wizard. 4. In the Printer Name or IP Address field, enter the IB-2x IP address. 5. In the Port Name field, enter the desired port name or accept the default. 6. After completion of the Add Standard TCP/IP Printer Port wizard, the Add Printer wizard will continue. Select the appropriate printer model. 7. After assigning the printer a name, the Printer Sharing dialog is displayed. If the printer is to be shared, select Share As and enter the share name. (Printer Sharing will only be available if the 9
-
 1
1 -
2
-
 3
3 -
 4
4 -
 5
5 -
 6
6 -
 7
7 -
 8
8 -
 9
9 -
 10
10 -
 11
11 -
 12
12 -
 13
13 -
14
-
15
-
16
-
17
-
18
-
19
-
20
-
21
-
22
-
23
-
24
-
25
-
26
-
27
-
28
-
29
-
30
-
31
-
32
-
33
-
34
-
35
-
36
-
37
-
38
-
39
-
40
-
41
-
42
-
43
-
44
-
45
-
46
-
47
-
48
-
49
-
50
-
51
-
52
-
53
-
54
-
55
-
56
-
57
-
58
-
59
-
60
-
61
-
62
-
63
-
64
-
65
-
66
-
67
-
68
-
69
-
70
-
71
-
72
-
73
-
74
-
75
-
76
-
77
-
78
-
79
-
80
-
81
-
82
-
83
-
84
-
85
-
86
-
87
-
88
-
89
-
90
-
91
-
92
-
93
-
94
-
95
-
96
-
97
-
98
-
99
-
100
-
101
-
102
-
103
-
104
-
105
-
106
-
107
-
108
-
109
-
110
-
111
-
112
-
113
-
114
-
115
-
116
-
117
-
118
-
119
-
120
-
121
-
122
-
123
-
124
-
125
-
126
-
127
-
128
-
129
-
130
-
131
-
132
-
133
-
134
-
135
-
136
-
137
-
138
-
139
-
140
-
141
-
142
-
143
-
144
-
145
-
146
-
147
-
148
-
149
-
150
-
151
-
152
-
153
-
154
-
155
-
156
-
157
-
158
-
159
-
160
-
161
-
162
-
163
-
164
-
165
-
166
-
167
-
168
-
169
-
170
-
171
-
172
-
173
-
174
-
175
-
176
-
177
-
178
-
179
-
180
-
181
-
182
-
183
-
184
-
185
-
186
-
187
-
188
-
189
-
190
-
191
-
192
-
193
-
194
-
195
-
196
-
197
-
198
-
199
-
200
-
201
-
202
-
203
-
204
-
205
 |
 |