Kyocera KM-1650 1650/2050/2550 Operation Guide Rev-4 (Basic) - Page 85
Notes, Important
 |
View all Kyocera KM-1650 manuals
Add to My Manuals
Save this manual to your list of manuals |
Page 85 highlights
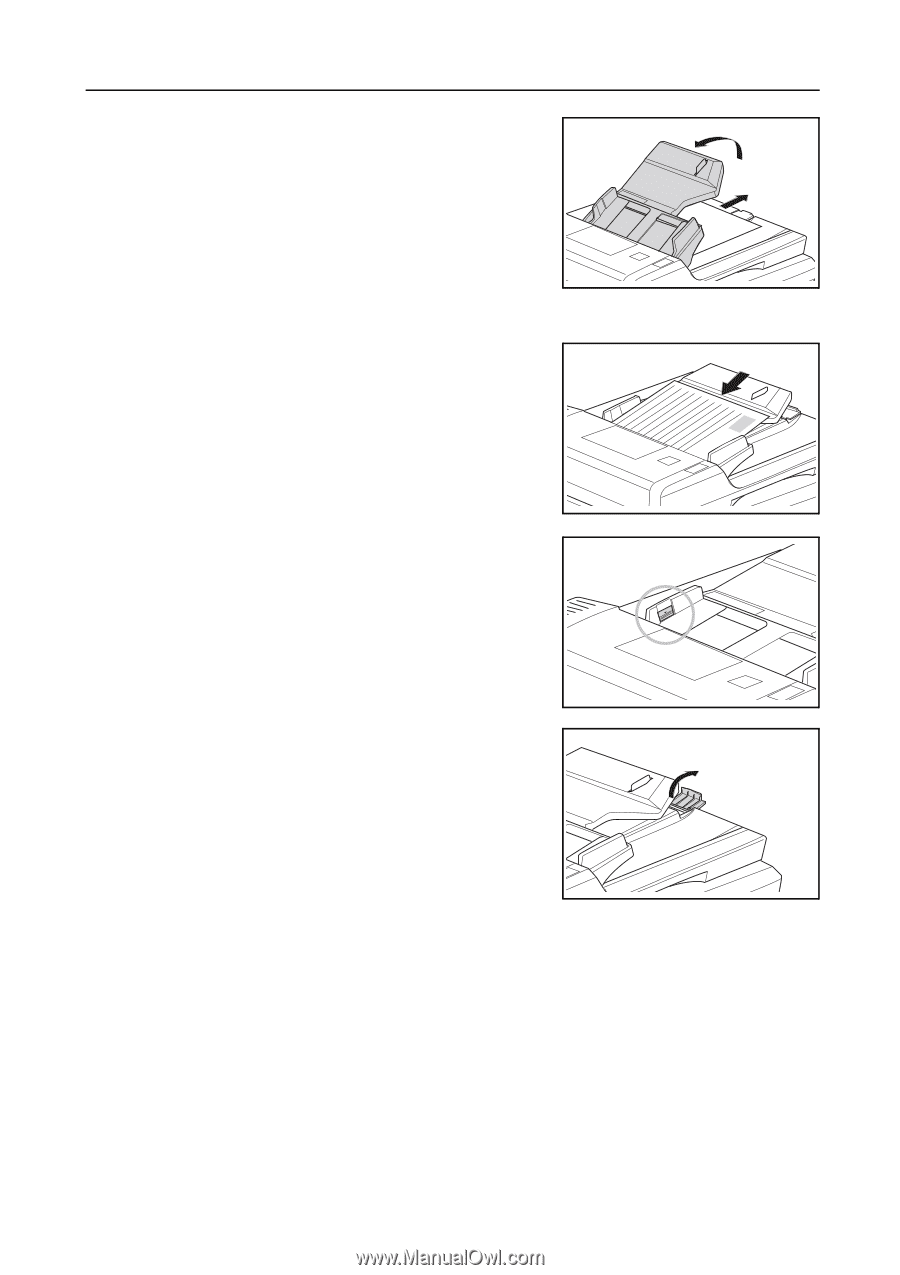
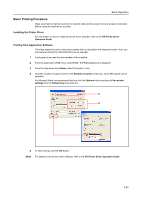
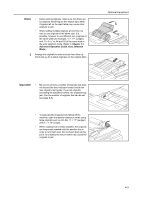
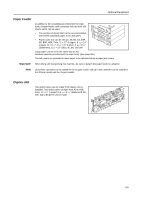
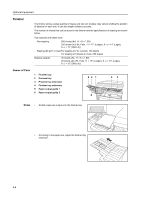
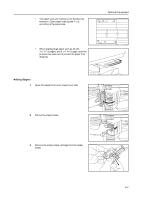
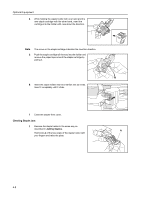
Notes 2 • Before setting originals, make sure that there are no originals remaining on the original eject table. Originals left on the eject table may cause other originals to jam. • When setting multiple originals at one time, be sure to use originals of the same size. It is, possible, however to use different size originals of the same width (for example, 11 × 17" (Ledger) and 11 × 8 1/2" or A4 and A3 at the same time in the auto selection mode. (Refer to Chapter 1 in Advanced Operation Guide, Auto Selection Mode.) Arrange the originals in order and set them face up (front side up for 2-sided originals) on the original table. Optional Equipment Important! • Be sure to set only a number of originals that does not exceed the level indicator located inside the rear original insert guide. If you set originals exceeding the specified number, the originals may jam. (For the number of originals that can be set, see page 4-1.) • To keep ejected originals from falling off the machine, open the ejection extension when using large originals such as A3, B4, 11 × 17" (Ledger), and 8 1/2 × 14" (Legal). • When copying from 2-sided originals, the originals are temporarily ejected onto the ejection tray in order to turn them over. Do not touch them at this point. Any attempt to remove them may cause the originals to jam. 4-3
-
 1
1 -
2
-
3
-
4
-
5
-
6
-
7
-
8
-
9
-
10
-
11
-
12
-
13
-
14
-
15
-
16
-
17
-
18
-
19
-
20
-
21
-
22
-
23
-
24
-
25
-
26
-
27
-
28
-
29
-
30
-
31
-
32
-
33
-
34
-
35
-
36
-
37
-
38
-
39
-
40
-
41
-
42
-
43
-
44
-
45
-
46
-
47
-
48
-
49
-
50
-
51
-
52
-
53
-
54
-
55
-
56
-
57
-
58
-
59
-
60
-
61
-
62
-
63
-
64
-
65
-
66
-
67
-
68
-
69
-
70
-
71
-
72
-
73
-
74
-
75
-
76
-
77
-
78
-
79
-
 80
80 -
 81
81 -
 82
82 -
 83
83 -
 84
84 -
 85
85 -
 86
86 -
 87
87 -
 88
88 -
 89
89 -
 90
90 -
91
-
92
-
93
-
94
-
95
-
96
-
97
-
98
-
99
-
100
-
101
-
102
-
103
-
104
-
105
-
106
-
107
-
108
-
109
-
110
-
111
-
112
-
113
-
114
-
115
-
116
-
117
-
118
-
119
-
120
-
121
-
122
-
123
-
124
-
125
-
126
-
127
-
128
-
129
-
130
-
131
-
132
-
133
-
134
-
135
-
136
-
137
-
138
-
139
-
140
 |
 |