Kyocera TASKalfa 255 255/305 Operation Guide - Page 254
Gray Adjustment, Procedure, Drum Refresh 1, Auto Drum Refresh
 |
View all Kyocera TASKalfa 255 manuals
Add to My Manuals
Save this manual to your list of manuals |
Page 254 highlights
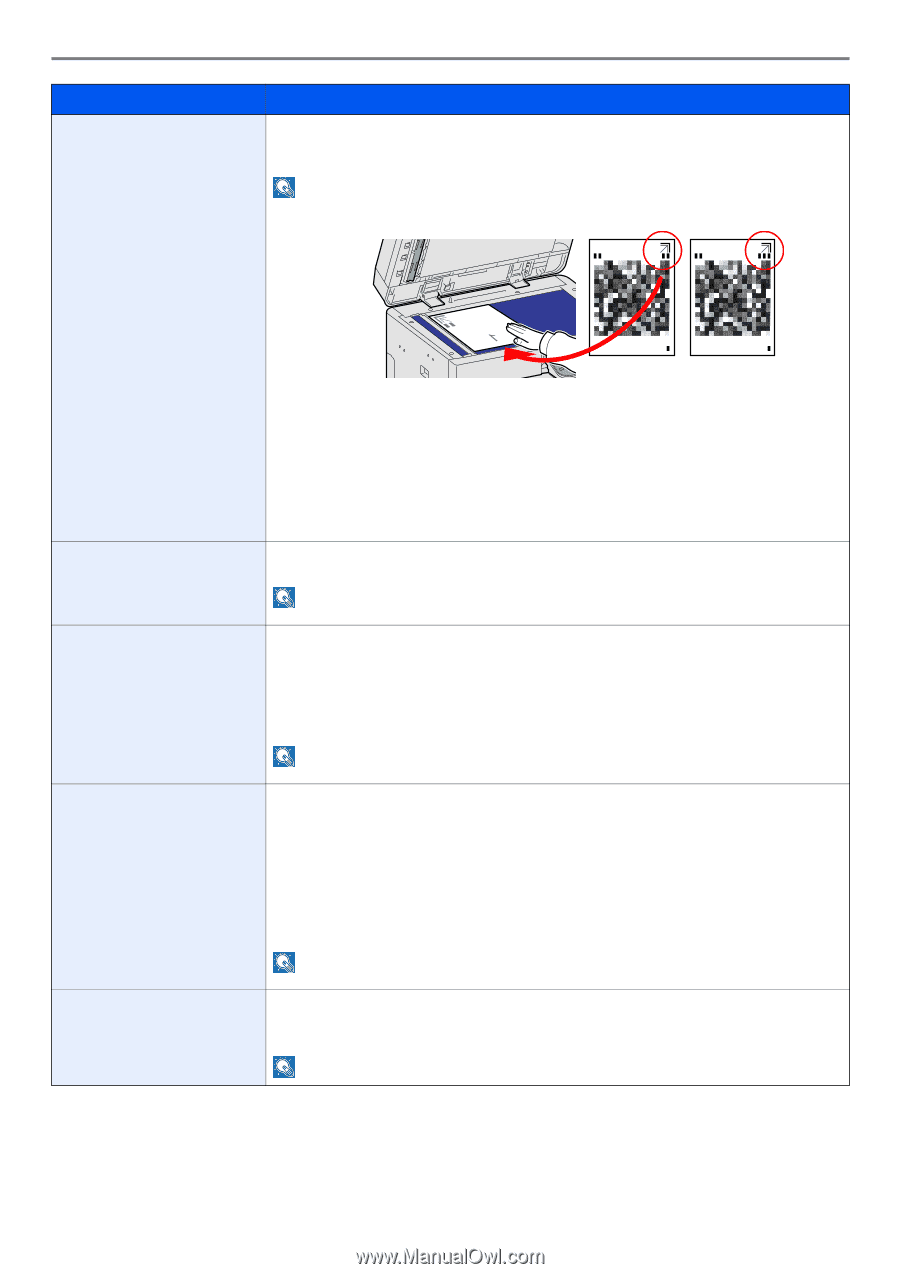
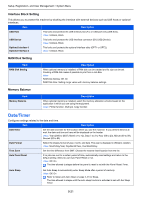
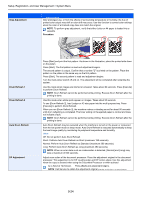
Setup, Registration, and User Management > System Menu Gray Adjustment Description After prolonged use, or from the effects of surrounding temperature or humidity, the hue of printed color output may shift or color drift may occur. Use this function to correct color settings when the color of a finished copy does not match the original. NOTE: To perform gray adjustment, verify that either Letter or A4 paper is loaded into a cassette. Procedure Drum Refresh 1 Drum Refresh 2 Auto Drum Refresh DP Adjustment 1 2 Press [Start] and print the first pattern. As shown in the illustration, place the printed side down on the platen. Press [Start]. The first pattern is read and adjustment begins. The second pattern is output. Confirm that a number "2" is printed on the pattern. Place the pattern on the platen in the same way as the first pattern. Press [Start]. The second pattern is read and adjustment begins. Turn the main power switch off and on. The adjustment will be completed after restarting the system. Use this mode when images are blurred or smeared. Takes about 90 seconds. Press [Execute] to perform Drum Refresh. NOTE: Drum Refresh cannot be performed while printing. Execute Drum Refresh after the printing is done. Use this mode when white spots appear on images. Takes about 90 seconds. To use [Drum Refresh 2], load Ledger or A3 size paper into the multi purpose tray. Press [Execute] to perform Drum Refresh. When you run [Drum Refresh 2], the machine makes a vibrating sound for about 90 seconds until drum refreshing is completed. The toner soiling on the ejected paper is normal and does not indicate a fault. NOTE: Drum Refresh cannot be performed while printing. Execute Drum Refresh after the printing is done. Auto Drum Refresh may be executed when the machine is turned on the power or recovered from the low power mode or sleep mode. Auto Drum Refresh is executed automatically to keep the best image quality by monitoring its peripheral temperature and humidity. Value Off: Do not perform Auto Drum Refresh. Short: Perform Auto Drum Refresh as Short (maximum 180 seconds). Normal: Perform Auto Drum Refresh as Standard (maximum 360 seconds). Long: Perform Auto Drum Refresh as Long (maximum 450 seconds). NOTE: When an error state such as condensation is detected, [Normal] and [Long] may take a maximum of 630 seconds. Adjust scan action of the document processor. Place the adjustment original in the document processor. This adjustment is for DP Leading edge and DP center adjust. Use this adjustment when the copy is skewed when using the Document Processor or when advised by a Service Technician. Press [Start] and adjustment begins. NOTE: Call Service to obtain the adjustment original (P/N 303LJ57010 SHEET DP ADJUSTMENT. 9-24
-
 1
1 -
2
-
3
-
4
-
5
-
6
-
7
-
8
-
9
-
10
-
11
-
12
-
13
-
14
-
15
-
16
-
17
-
18
-
19
-
20
-
21
-
22
-
23
-
24
-
25
-
26
-
27
-
28
-
29
-
30
-
31
-
32
-
33
-
34
-
35
-
36
-
37
-
38
-
39
-
40
-
41
-
42
-
43
-
44
-
45
-
46
-
47
-
48
-
49
-
50
-
51
-
52
-
53
-
54
-
55
-
56
-
57
-
58
-
59
-
60
-
61
-
62
-
63
-
64
-
65
-
66
-
67
-
68
-
69
-
70
-
71
-
72
-
73
-
74
-
75
-
76
-
77
-
78
-
79
-
80
-
81
-
82
-
83
-
84
-
85
-
86
-
87
-
88
-
89
-
90
-
91
-
92
-
93
-
94
-
95
-
96
-
97
-
98
-
99
-
100
-
101
-
102
-
103
-
104
-
105
-
106
-
107
-
108
-
109
-
110
-
111
-
112
-
113
-
114
-
115
-
116
-
117
-
118
-
119
-
120
-
121
-
122
-
123
-
124
-
125
-
126
-
127
-
128
-
129
-
130
-
131
-
132
-
133
-
134
-
135
-
136
-
137
-
138
-
139
-
140
-
141
-
142
-
143
-
144
-
145
-
146
-
147
-
148
-
149
-
150
-
151
-
152
-
153
-
154
-
155
-
156
-
157
-
158
-
159
-
160
-
161
-
162
-
163
-
164
-
165
-
166
-
167
-
168
-
169
-
170
-
171
-
172
-
173
-
174
-
175
-
176
-
177
-
178
-
179
-
180
-
181
-
182
-
183
-
184
-
185
-
186
-
187
-
188
-
189
-
190
-
191
-
192
-
193
-
194
-
195
-
196
-
197
-
198
-
199
-
200
-
201
-
202
-
203
-
204
-
205
-
206
-
207
-
208
-
209
-
210
-
211
-
212
-
213
-
214
-
215
-
216
-
217
-
218
-
219
-
220
-
221
-
222
-
223
-
224
-
225
-
226
-
227
-
228
-
229
-
230
-
231
-
232
-
233
-
234
-
235
-
236
-
237
-
238
-
239
-
240
-
241
-
242
-
243
-
244
-
245
-
246
-
247
-
248
-
 249
249 -
 250
250 -
 251
251 -
 252
252 -
 253
253 -
 254
254 -
 255
255 -
 256
256 -
 257
257 -
 258
258 -
 259
259 -
260
-
261
-
262
-
263
-
264
-
265
-
266
-
267
-
268
-
269
-
270
-
271
-
272
-
273
-
274
-
275
-
276
-
277
-
278
-
279
-
280
-
281
-
282
-
283
-
284
-
285
-
286
-
287
-
288
-
289
-
290
-
291
-
292
-
293
-
294
-
295
-
296
-
297
-
298
-
299
-
300
-
301
-
302
-
303
-
304
-
305
-
306
-
307
-
308
-
309
-
310
-
311
-
312
-
313
-
314
-
315
-
316
-
317
-
318
-
319
-
320
-
321
-
322
-
323
-
324
-
325
-
326
-
327
-
328
-
329
-
330
-
331
-
332
-
333
-
334
-
335
-
336
-
337
-
338
-
339
-
340
-
341
-
342
-
343
-
344
-
345
-
346
-
347
-
348
-
349
-
350
-
351
-
352
-
353
-
354
-
355
-
356
-
357
-
358
-
359
-
360
 |
 |