Kyocera TASKalfa 255c 205c/255c Driver Guide - Page 40
Editing a Profile, Profiles, Description, Apply, Select profile, Delete, Factory, Default, Import
 |
View all Kyocera TASKalfa 255c manuals
Add to My Manuals
Save this manual to your list of manuals |
Page 40 highlights
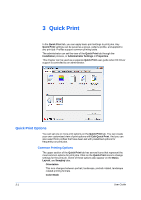
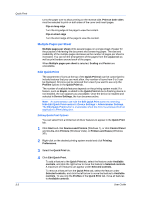
Quick Print 2 Click Profiles > Save. 3 To identify the profile, type a Name, select an Icon, and type a Description. 4 Click OK to save the profile. The newly added profile appears in the Profiles dialog box. 5 Click Apply to use the selected profile for the current print job, or click OK to close the dialog box. Note: To reset the printer driver to default settings, select the Factory Default profile, and click Apply. This clears the settings of a selected profile. You can remove a profile by selecting it in the Select profile list and clicking Delete. Editing a Profile The Edit button lets you make changes to an existing profile. The Factory Default profile cannot be edited. 1 Click Profiles. 2 In the Select profile section, select the profile to be edited, and click Edit. 3 Any of the three options can be edited: name, icon and description. Click OK to save the edited changes. The newly edited profile appears in the Profiles dialog box. 4 Click Apply to activate the selected profile to the current print job, or click OK to close the dialog box. Importing a Profile The Import button lets you import a copy of a profile from other printer drivers into your printer driver. 1 Click Profiles > Import. 2 Browse for the existing profile (.KXP), select it, and click Open. A message appears if any of the profile settings in the imported file are unavailable in the existing driver. Select Yes, to import the profile, or No, to cancel the import. 3 If you selected Yes in the previous step, the newly imported file appears in the Profile dialog box. 4 Click Apply to use the selected profile for the current print job, or click OK to close the dialog box. 3-5 User Guide
-
 1
1 -
2
-
3
-
4
-
5
-
6
-
7
-
8
-
9
-
10
-
11
-
12
-
13
-
14
-
15
-
16
-
17
-
18
-
19
-
20
-
21
-
22
-
23
-
24
-
25
-
26
-
27
-
28
-
29
-
30
-
31
-
32
-
33
-
34
-
 35
35 -
 36
36 -
 37
37 -
 38
38 -
 39
39 -
 40
40 -
 41
41 -
 42
42 -
 43
43 -
 44
44 -
 45
45 -
46
-
47
-
48
-
49
-
50
-
51
-
52
-
53
-
54
-
55
-
56
-
57
-
58
-
59
-
60
-
61
-
62
-
63
-
64
-
65
-
66
-
67
-
68
-
69
-
70
-
71
-
72
-
73
-
74
-
75
-
76
-
77
-
78
-
79
-
80
-
81
-
82
-
83
-
84
-
85
-
86
-
87
-
88
-
89
-
90
-
91
-
92
-
93
-
94
-
95
-
96
-
97
-
98
-
99
 |
 |
