Kyocera TASKalfa 3011i Kyocera NET ADMIN Operation Guide for Ver 3.2.2016.3 - Page 13
Adding an IPv6 Network, Preparing Windows XP to Install a Remote Agent, Installing an Agent
 |
View all Kyocera TASKalfa 3011i manuals
Add to My Manuals
Save this manual to your list of manuals |
Page 13 highlights
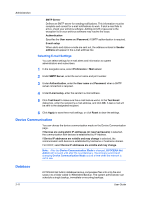
Administration 3 Click Next to proceed to the Select an Agent page. Adding an IPv6 Network You can add an IPv6 network. IPv6 options are not available if the IPv6 protocol is disabled or not supported on the server. Specify as much of the specific address and prefix as necessary to discover your device. The application uses a one-by-one discovery method for IPv6 addresses. For example, in prefix 64 networks, to discover a device with the network address fd80:39f0:a2ae:82a:0:0:0:0150, it is sufficient to type the address as fd80:39f0:a2ae:82a:0:0:0:0100, and select 120 as the prefix. The discovery process will cover the range of the following addresses, and the device will be added: Start IP: fd80:39f0:a2ae:82a:0:0:0:0100 End IP: fd80:39f0:a2ae:82a:0:0:0:01FF 1 Type the IPv6 network IP Address, for example, fd80:39f0:a2ae:82a:0:0:0:0100. 2 Select the Prefix for the network address. The prefix is an analog of the IPv4 subnet mask. Prefixes in the list range from 112 to 127. The default selection is 120. For example, prefix 120 is selected. The first 120 bits then defines the subnet mask of the network. (Prefix 120 is the same as the ffff::fffff:fffff:fffff:fffff:fffff:ffff:ff00 IPv6 mask.) 3 Click Next to proceed to the Select an Agent page. Preparing Windows XP to Install a Remote Agent 1 To ensure a successful remote agent installation within a workgroup, go to My Computer > Tools > Folder options. 2 In the Folder Options dialog box, click View. 3 Under Advanced Settings, clear the Use simple file sharing (Recommended) check box. 4 Click OK. Installing an Agent 1 On the Select an Agent page, select Local Agent, New Agent, or Remote Agent. Remote Agent appears if it was previously created through New Agent. Click Next. Note: There are several prerequisite steps to perform before you install a remote agent within a workgroup on a Windows XP operating system. For more information, see Preparing Windows XP to Install a Remote Agent. 2 On the Enter the Agent Details page, enter the required information for the agent: KYOCERA Net Admin 2-6
-
 1
1 -
2
-
3
-
4
-
5
-
6
-
7
-
 8
8 -
 9
9 -
 10
10 -
 11
11 -
 12
12 -
 13
13 -
 14
14 -
 15
15 -
 16
16 -
 17
17 -
 18
18 -
19
-
20
-
21
-
22
-
23
-
24
-
25
-
26
-
27
-
28
-
29
-
30
-
31
-
32
-
33
-
34
-
35
-
36
-
37
-
38
-
39
-
40
-
41
-
42
-
43
-
44
-
45
-
46
-
47
-
48
-
49
-
50
-
51
-
52
-
53
-
54
-
55
-
56
-
57
-
58
-
59
-
60
-
61
 |
 |
