LG 60PC1D Owners Manual - Page 9
Connection Options, Model Name: 42PC3D/3DC/3DV, 50PC3D, 60PC1D/1DC - remote
 |
UPC - 719192170421
View all LG 60PC1D manuals
Add to My Manuals
Save this manual to your list of manuals |
Page 9 highlights
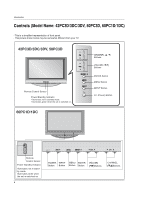
Introduction Connection Options (Model Name: 42PC3D/3DC/3DV, 50PC3D, 60PC1D/1DC) - This picture shown below may be somewhat different from your TV. S-VIDEO Input AV IN 2 Provides better picture quality than the video input. R AUDIO Input Connections are available for lis/MONO tening to stereo sound from an external device. VIDEO Input Connects the video signal from a 11 video device. COMPONENT IN AV OUT AV IN 1 COMPONENT IN AV OUT AV IN 1 10 SERVICE 6 4 ANTENNA/ CABLE IN HDMI IN 2 1(DVI) 7 RGB IN 5 8 (CONTROL & SERVICE) 9 OPTICAL OUT 1 VIDEO AUDIO VIDEO AUDIO 2 (MONO) 3 S-VIDEO VIDEO AUDIO S-VIDEO VIDEO ( ) AUDIO 1 COMPONENT IN Connect a component video/audio device to these jacks. 7 RGB IN (PC) Connect the monitor output from a PC to the appropriate input port. 2 AV OUT Connect a second TV or monitor. 3 AV (Audio/Video) IN 1 Connect audio/video output from an external device to these jacks. S-VIDEO Connect S-Video out from an S-VIDEO device. 4 ANTENNA/CABLE IN Connect over-the air signals to this jack. Connect cable signals to this jack. 5 DIGITAL AUDIO OUT Connect digital audio from various types of equipment. Note: In standby mode, these ports do notVwIDEOork. 8 Remote Control Port Connect your wired remote control. AUDIO IN (RGB/DVI) Connect the monitor output from a PC to the appropriate input port. 9 RS-232C IN (CONTROL & SERVICE) PORT Connect to the RS-232C port on a PC. 10 SERVICE 11 Power Cord Socket For operation with AC power. Caution: Never attempt to operate the TV on DC power. AUDIO COMPONENT IN AV OUT AV IN 1 COMPONENT IN AV OUT AV IN 1 6 HDMI IN VIDEO AUDIO Connect a HDMI signal to 1(DVI) or 2. Or DVI (VIDEO)signal to the 1(DVI) port with a DVI to HDMI cable. S-VIDEO VIDEO ( ) AUDIO 9 S-VIDEO VIDEO ( ) AUDIO
-
 1
1 -
2
-
3
-
 4
4 -
 5
5 -
 6
6 -
 7
7 -
 8
8 -
 9
9 -
 10
10 -
 11
11 -
 12
12 -
 13
13 -
 14
14 -
15
-
16
-
17
-
18
-
19
-
20
-
21
-
22
-
23
-
24
-
25
-
26
-
27
-
28
-
29
-
30
-
31
-
32
-
33
-
34
-
35
-
36
-
37
-
38
-
39
-
40
-
41
-
42
-
43
-
44
-
45
-
46
-
47
-
48
-
49
-
50
-
51
-
52
-
53
-
54
-
55
-
56
-
57
-
58
-
59
-
60
-
61
-
62
-
63
-
64
-
65
-
66
-
67
-
68
 |
 |
