LG CBGS3628S INSTALLATION - Page 12
Adjusting the Surface Burner Low, Flame Simmer Setting
 |
View all LG CBGS3628S manuals
Add to My Manuals
Save this manual to your list of manuals |
Page 12 highlights
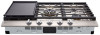
en-us_main.book.book Page 12 Friday, November 4, 2022 8:08 AM 12 INSTALLATION Electric Ignition Select a top burner knob, push down and then turn counterclockwise to the LITE position. You can hear a clicking sound indicating proper operation of the spark module. Once the air has been purged from the supply lines, burners should ignite within 4 seconds. After the burner ignites, rotate the knob out of the LITE position. Try each burner in succession until all burners have been checked. The combustion quality of the burner flames needs to be confirmed visually. a Yellow flames - Call for service b Yellow tips on outer cones - Normal for LP gas c Soft blue flames - Normal for natural gas If burner flames look like a, call for service. b or c is normal for burner flames, depending on the type of gas you use. With LP gas, some yellow tipping on outer cones is normal. 8. Adjusting the Surface Burner Low Flame (Simmer) Setting 1 Light all surface burners. 2 Turn the knob on the burner being adjusted to LO (LOW). 3 Remove the knob. 4 On dual burner knob rings only, remove the plastic cover a on the knob ring by turning it counterclockwise. CLOSE OPEN 5 For single-valve burners, insert a small, flatblade screwdriver into the valve stem. For dual-valve burners, insert a small, flatblade screwdriver into the hole to the left of the valve stem. a Single Valve Adjustment Screw b Dual Valve Adjustment Screw 6 Turn the adjustment screw until the flame reaches the desired size. 7 Replace the knob. 8 Test the flame stability. Test 1 • Turn the knob from HI to LOW quickly. • lf the flame goes out, increase the flame size and test again. Test 2 • With the burner on a LOW setting, open and close the oven or cabinet door quickly. • If the flame is extinguished by the air currents created by the door movement, increase the flame height and test again. 9 Repeat steps 1 - 6 for each surface burner. 10 After setting the low flame, turn off the burner.
-
 1
1 -
2
-
3
-
4
-
5
-
6
-
 7
7 -
 8
8 -
 9
9 -
 10
10 -
 11
11 -
 12
12 -
 13
13 -
 14
14 -
 15
15 -
 16
16 -
 17
17 -
18
-
19
-
20
-
21
-
22
-
23
-
24
-
25
-
26
-
27
-
28
-
29
-
30
-
31
-
32
-
33
-
34
-
35
-
36
-
37
-
38
-
39
-
40
-
41
-
42
-
43
-
44
 |
 |
