LG DLE2140W Owner's Manual - Page 16
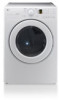
LG DLE2140W Manual
 |
UPC - 048231011402
View all LG DLE2140W manuals
Add to My Manuals
Save this manual to your list of manuals |
Page 16 highlights
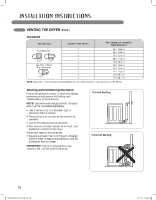
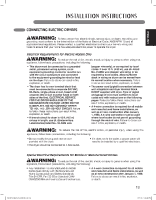
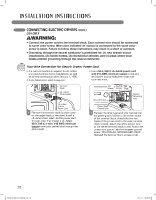
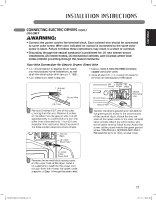
vENTING THE DRYER (cont.) Ductwork Wall Cap Type Number of 90° Elbows 0 1 2 4" (10.2 cm) 4" (10.2 cm) Max. Length of 4 inches Dia. Rigid Metal Duct 65 ft. (19.8 m) 55 ft. (16.8 m) 47 ft. (13.7 m) 36 ft. (11.0 m) 28 ft. (8.5 m) 55 ft. (16.8 m) 47 ft. (13.7 m) 41 ft. (12.5 m) 30 ft. (9.1 m) 22 ft. (6.7 m) Recommended 3 4 0 1 2 3 4 Use Only for Short Run Installations 21/2" (6.35 cm) NOTE: Deduct 6 ft. (1.8 m) for each additional elbow. It is not recommended to use more than four 90° elbows. Routing and Connecting Ductwork Follow the guidelines below to maximize drying performance and reduce lint buildup and condensation in the ductwork. NOTE: Ductwork and fittings are NOT included and must be purchased separately. • Use 4 inches (10.2 cm) diameter rigid or semirigid metal ductwork. • The exhaust duct run should be as short as possible. • Use as few elbow joints as possible. • The male end of each section of exhaust duct must point away from the dryer. • Use duct tape on all duct joints. • Insulate ductwork that runs through unheated areas in order to reduce condensation and lint buildup on duct surfaces. IMPORTANT: Failure to exhaust the dryer correctly will void the dryer's warranty. Correct Venting Incorrect Venting 16 MFL62512832_EN_100720.indd 16 7/21/10 1:55:48 PM
-
 1
1 -
2
-
3
-
4
-
5
-
6
-
7
-
8
-
9
-
10
-
 11
11 -
 12
12 -
 13
13 -
 14
14 -
 15
15 -
 16
16 -
 17
17 -
 18
18 -
 19
19 -
 20
20 -
 21
21 -
22
-
23
-
24
-
25
-
26
-
27
-
28
-
29
-
30
-
31
-
32
-
33
-
34
-
35
-
36
-
37
-
38
-
39
-
40
-
41
-
42
-
43
-
44
-
45
-
46
-
47
-
48
-
49
-
50
-
51
-
52
-
53
-
54
-
55
-
56
-
57
-
58
-
59
-
60
-
61
-
62
-
63
-
64
-
65
-
66
-
67
-
68
-
69
-
70
-
71
-
72
-
73
-
74
-
75
-
76
-
77
-
78
-
79
-
80
-
81
-
82
-
83
-
84
-
85
-
86
-
87
-
88
-
89
-
90
-
91
-
92
-
93
-
94
-
95
-
96
-
97
-
98
-
99
-
100
-
101
-
102
-
103
-
104
-
105
-
106
-
107
-
108
-
109
-
110
-
111
-
112
-
113
-
114
-
115
-
116
-
117
-
118
-
119
-
120
-
121
-
122
-
123
-
124
 |
 |
