LG LRDCS2603S Owners Manual - Page 18
Reversing Door Opening, Direction
 |
View all LG LRDCS2603S manuals
Add to My Manuals
Save this manual to your list of manuals |
Page 18 highlights
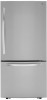
18 INSTALLATION Reversing Door Opening Direction 4 Assemble the mounting fasteners at both ends of the handle using a 1/4 in. (6.35 mm) Allen wrench. NOTE • To assist in the installation of the handle on the right side, place a piece of masking tape near the top of the handle before removing it. • The appearance of the handle may vary from what is shown in the illustrations. 5 Place the handle on the door by fitting the handle footprints over the mounting fasteners and tightening the set screws with a 3/32 in (2.5 mm) Allen wrench. Removing the Refrigerator Handles 1 Loosen the set screws with a 3/32 in (2.5 mm) Allen wrench and remove the handle. 2 Loosen the mounting fasteners that connect to the refrigerator door and handle using a 1/4 in. (6.35 mm) Allen wrench, and remove the mounting fasteners. Reversing the Doors 1 Remove the top hinge cover screws . Lift the hook (not visible), located at the bottom of the front side of the cover , with a at-head screwdriver. 3 Carefully loosen the plug buttons with your fingers. The buttons can be unscrewed with the fingers by rotating them counter-clockwise and continuing until they loosen and fall out The buttons were installed without pressure, and for this reason, they can be unscrewed using your index finger, thumb or both. Install the plug buttons on the left side. 2 Rotate the hinge lever clockwise. Lift the top hinge free of the hinge lever latch . CAUTION • When lifting the hinge, be careful that the door does not fall forward.
-
 1
1 -
2
-
3
-
4
-
5
-
6
-
7
-
8
-
9
-
10
-
11
-
12
-
 13
13 -
 14
14 -
 15
15 -
 16
16 -
 17
17 -
 18
18 -
 19
19 -
 20
20 -
 21
21 -
 22
22 -
 23
23 -
24
-
25
-
26
-
27
-
28
-
29
-
30
-
31
-
32
-
33
-
34
-
35
-
36
-
37
-
38
-
39
-
40
-
41
-
42
-
43
-
44
-
45
-
46
-
47
-
48
-
49
-
50
-
51
-
52
-
53
-
54
-
55
-
56
 |
 |
