LG LRDCS2603S Owners Manual - Page 24
Leveling, Turning on the Power
 |
View all LG LRDCS2603S manuals
Add to My Manuals
Save this manual to your list of manuals |
Page 24 highlights
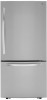
24 INSTALLATION Leveling The refrigerator has two front leveling legs. Adjust the legs to alter the tilt from front-to-back or sideto side. If the refrigerator seems unsteady, or the doors do not close easily, adjust the refrigerator's tilt using the instructions below: 1 Turn the leveling leg to the left to raise that side of the refrigerator or to the right to lower it. It may take several turns of the leveling leg to adjust the tilt of the refrigerator. NOTE • A flare nut wrench works best, but an open-end wrench will suffice. Do not over-tighten. Position the Refrigerator • Arrange the coil of tubing so that it does not vibrate against the back of the refrigerator or against the wall. Push the refrigerator back to the wall. Start the Icemaker • If the water line is connected, set the icemaker power switch to the ON position. • The icemaker will not begin to operate until it reaches its operating temperature of 10 °F (-12 °C) or below. It will then begin operation automatically if the icemaker power switch is in the ON (I) position. 2 Open both doors and check to make sure that they close easily. If the doors do not close easily, tilt the refrigerator slightly more to the rear by turning both leveling legs to the left. It may take several more turns, and be sure to turn both leveling legs the same amount. Turning on the Power • After installing, plug the refrigerator's power cord into a 3-prong grounded outlet and push the refrigerator into the final position. CAUTION • Connect to a rated power outlet. • Have a certified electrician check the wall outlet and wiring for proper grounding. • Do not damage or cut off the ground terminal of the power plug.
-
 1
1 -
2
-
3
-
4
-
5
-
6
-
7
-
8
-
9
-
10
-
11
-
12
-
13
-
14
-
15
-
16
-
17
-
18
-
 19
19 -
 20
20 -
 21
21 -
 22
22 -
 23
23 -
 24
24 -
 25
25 -
 26
26 -
 27
27 -
 28
28 -
 29
29 -
30
-
31
-
32
-
33
-
34
-
35
-
36
-
37
-
38
-
39
-
40
-
41
-
42
-
43
-
44
-
45
-
46
-
47
-
48
-
49
-
50
-
51
-
52
-
53
-
54
-
55
-
56
 |
 |
