LG LRSDS2706D Owners Manual - Page 20
Leveling and Door, Alignment
 |
View all LG LRSDS2706D manuals
Add to My Manuals
Save this manual to your list of manuals |
Page 20 highlights
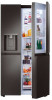
20 INSTALLATION NOTE • Insert the end of the copper tubing into the connection as far as possible. While holding the tubing, tighten the fitting. doors do not close easily, adjust the refrigerator's tilt using the instructions below: 1 Turn the leveling leg to the left to raise that side of the refrigerator or to the right to lower it. It may take several turns of the leveling leg to adjust the tilt of the refrigerator. a Tubing Clamp b ¼ in. Tubing c ¼ in. Compression Nut d Ferrule (sleeve) e Refrigerator Connection 10 Turn the water on at the shutoff valve. • Tighten any connections that leak. CAUTION • Check to see if leaks occur at the water line connections. • Make sure the house water valve is fully open. If it is not open completely, the icemaker and dispenser may not work properly. NOTE • A flare nut wrench works best, but an open-end wrench will suffice. Do not over-tighten. 2 Open both doors and check to make sure that they close easily. If the doors do not close easily, tilt the refrigerator slightly more to the rear by turning both leveling legs to the left. It may take several more turns, and be sure to turn both leveling legs the same amount. Door Alignment Both the left and right refrigerator doors have an adjustable nut, located on the bottom hinge, to raise and lower them to align properly. If the space between the doors is uneven, follow the instructions below to align the doors evenly: Use the wrench (included with the owner's manual) to turn the nut in the door hinge to adjust the height. Leveling and Door Alignment Leveling The refrigerator has two front leveling legs. Adjust the legs to alter the tilt from front-to-back or sideto side. If the refrigerator seems unsteady, or the 1 Open the door and use the wrench to loosen the keeper nut by turning it to the left.
-
 1
1 -
2
-
3
-
4
-
5
-
6
-
7
-
8
-
9
-
10
-
11
-
12
-
13
-
14
-
 15
15 -
 16
16 -
 17
17 -
 18
18 -
 19
19 -
 20
20 -
 21
21 -
 22
22 -
 23
23 -
 24
24 -
 25
25 -
26
-
27
-
28
-
29
-
30
-
31
-
32
-
33
-
34
-
35
-
36
-
37
-
38
-
39
-
40
-
41
-
42
-
43
-
44
-
45
-
46
-
47
-
48
-
49
-
50
-
51
-
52
-
53
-
54
-
55
-
56
-
57
-
58
-
59
-
60
-
61
-
62
-
63
-
64
 |
 |
