LG LTC22350SS Owner's Manual - Page 18
The Refrigerator Door Closer/Stop is not used - model
 |
UPC - 048231783743
View all LG LTC22350SS manuals
Add to My Manuals
Save this manual to your list of manuals |
Page 18 highlights
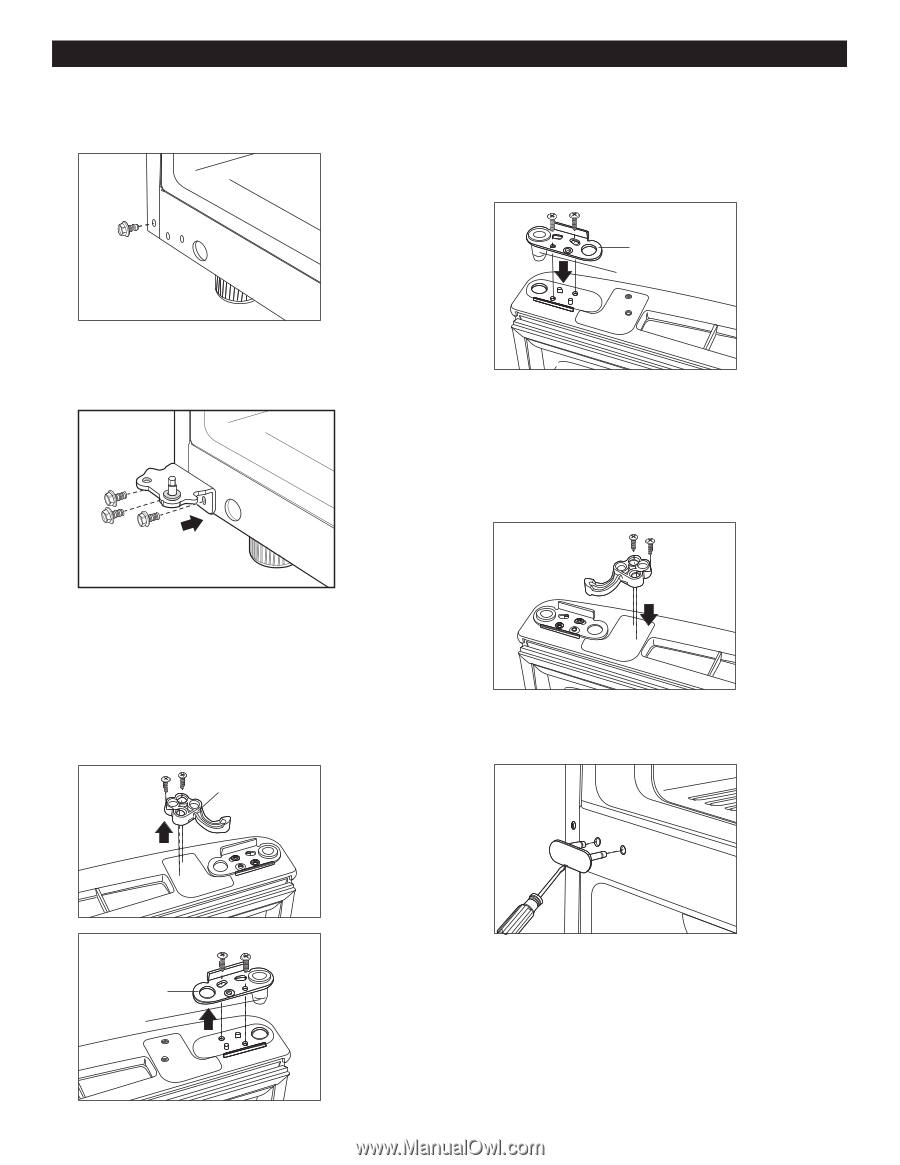
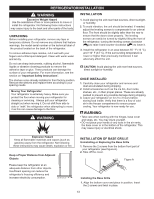
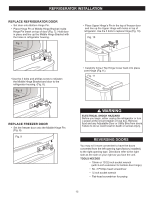
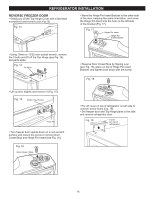
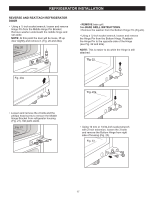
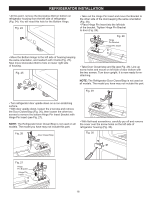
REFRIGERATOR INSTALLATION • At this point, remove the Decorative Bolt on bottom on refrigerator housing from the left side of refrigerator (Fig. 24). You will need this hole for the Bottom Hinge. Fig. 24 • Take out the Hinge Pin Insert and move the Bracket to the other side of the door,keeping the same orientation (Fig. 28). • Place Hinge Pin Insert into the left side of the bracket. Tighten Hinge Pin Bracket to door (Fig. 28). Fig. 28 Hinge Pin Bracket Hinge Pin Insert • Move the Bottom Hinge to the left side of housing keeping the same orientation, and reattach with 3 bolts (Fig. 25). Now move Decorative Bolt to hole on lower right side of housing. Fig. 25 • Take Door Closer/stop and flip (see Fig. 29). Line up screw holes and mount on left side of door bottom with the two screws. Turn door upright. It is now ready for reattaching. NOTE: The Refrigerator Door Closer/Stop is not used on all models. The model you have may not include this part. Fig. 29 • Turn refrigerator door upside down on a non-scratching surface. • With door upside down, loosen the 2 screws and remove the Door Closer/Stop (Fig. 26), then loosen the other two screws to remove the bottom Hinge Pin Insert Bracket with Hinge Pin Insert (see Fig. 27). NOTE: The Refrigerator Door Closer/Stop is not used on all models. The model you have may not include this part. • With flat-head screwdriver, carefully pry off and remove the cover over the screw holes on the left side of refrigerator housing (Fig. 30). Fig. 26 Door Closer/Stop Fig. 30 Fig. 27 Hinge Pin Bracket Hinge Pin Insert 18
-
 1
1 -
2
-
3
-
4
-
5
-
6
-
7
-
8
-
9
-
10
-
11
-
12
-
 13
13 -
 14
14 -
 15
15 -
 16
16 -
 17
17 -
 18
18 -
 19
19 -
 20
20 -
 21
21 -
 22
22 -
 23
23 -
24
-
25
-
26
-
27
-
28
-
29
-
30
-
31
-
32
-
33
-
34
-
35
-
36
-
37
 |
 |