LG N2A2DD2 Owner's Manual - Page 69
Configures a list of data to be backed up on a disc.
 |
UPC - 058231298741
View all LG N2A2DD2 manuals
Add to My Manuals
Save this manual to your list of manuals |
Page 69 highlights
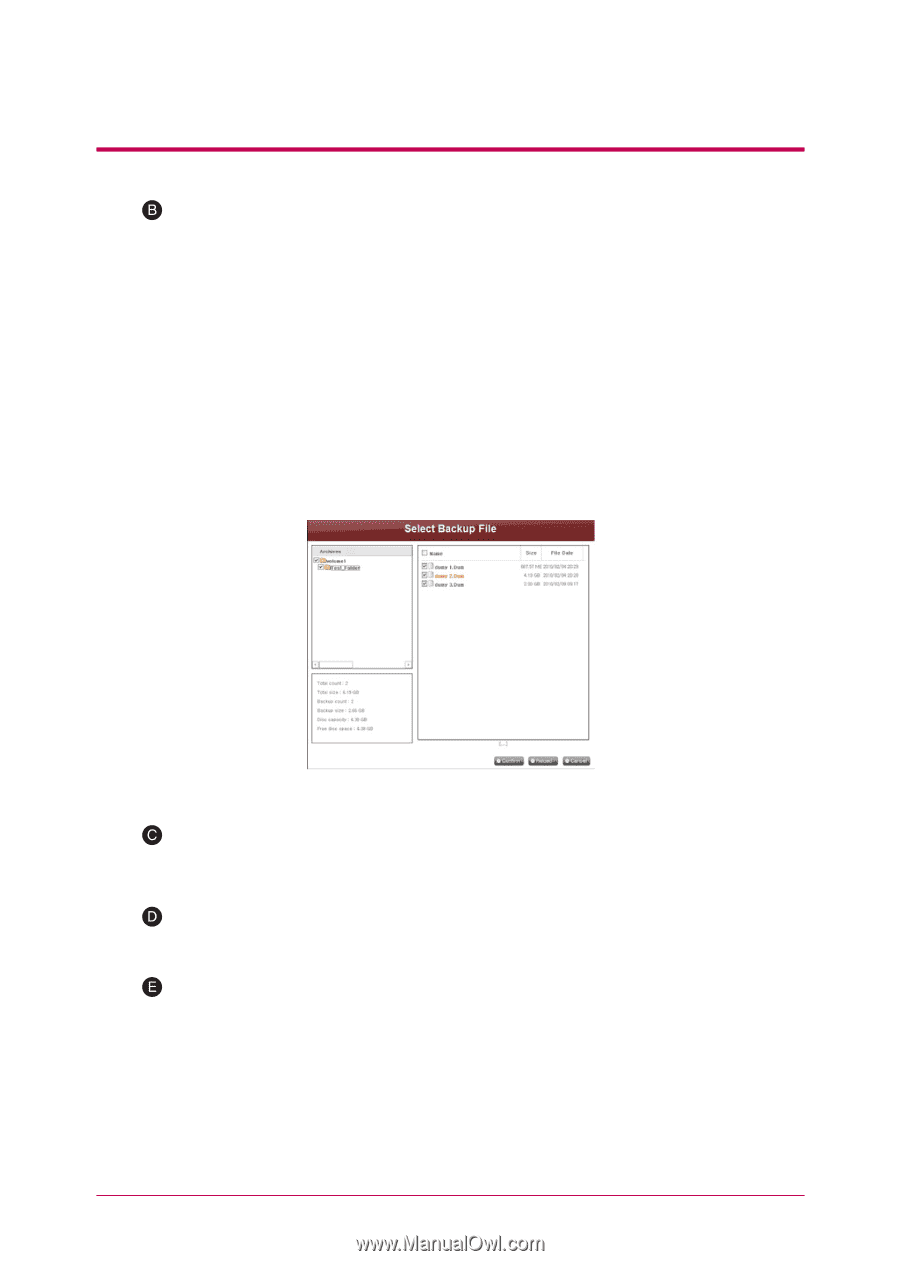
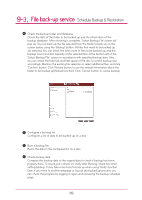
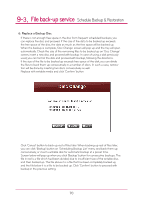
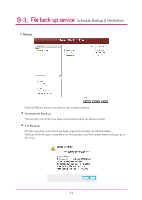
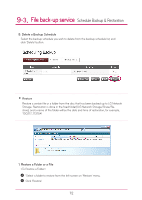
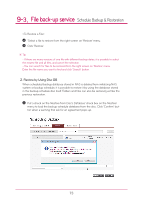
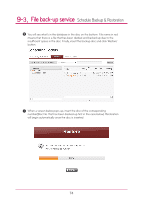
9-3. File back-up service Schedule Backup & Restoration Check the backup folder and database. Check the data of the folder to be backed up and the information of the backup database. After checking is complete, 'Select Backup File' screen will pop up. You can back up the file selected from the folder to back up on the screen below, using the 'Backup' button. All files that need to be backed up are selected. You can check the total count of files to be backed up, and the backup count and disc capacity of the selected files at the bottom left of the 'Select Backup File' screen, in accordance with specified backup data. Also, you can check the total size and free space of the disc to control backup size accordingly. Maintain the existing file selection or select additional files, and click 'Confirm' button. Click 'Reload' button to see the newest information about the folder to be backed up(Reload function). Click 'Cancel' button to cancel backup. Configure a burning list. Configures a list of data to be backed up on a disc. Burn a backup file. Burns the data in the configured list on a disc. Check backup data. Compare the backup data to the original data to check if backup has been properly done. To check, put a check on 'Verify after Burning' check box when setting backup. It may take more time to back up when using 'Verify' function. Even if you move to another webpage or log out during backup process, you can check the progress by logging in again and accessing the backup schedule page. 69
-
 1
1 -
2
-
3
-
4
-
5
-
6
-
7
-
8
-
9
-
10
-
11
-
12
-
13
-
14
-
15
-
16
-
17
-
18
-
19
-
20
-
21
-
22
-
23
-
24
-
25
-
26
-
27
-
28
-
29
-
30
-
31
-
32
-
33
-
34
-
35
-
36
-
37
-
38
-
39
-
40
-
41
-
42
-
43
-
44
-
45
-
46
-
47
-
48
-
49
-
50
-
51
-
52
-
53
-
54
-
55
-
56
-
57
-
58
-
59
-
60
-
61
-
62
-
63
-
 64
64 -
 65
65 -
 66
66 -
 67
67 -
 68
68 -
 69
69 -
 70
70 -
 71
71 -
 72
72 -
 73
73 -
 74
74 -
75
-
76
-
77
-
78
-
79
-
80
-
81
-
82
-
83
-
84
-
85
-
86
-
87
-
88
-
89
-
90
-
91
-
92
-
93
-
94
-
95
-
96
-
97
-
98
-
99
-
100
-
101
-
102
-
103
-
104
-
105
-
106
-
107
-
108
-
109
-
110
 |
 |