Lantronix N-GXE-POE-xx-01 Series N-GXE-POE-xx-01 User Guide Rev F - Page 23
Installation, Caution, Warning
 |
View all Lantronix N-GXE-POE-xx-01 Series manuals
Add to My Manuals
Save this manual to your list of manuals |
Page 23 highlights
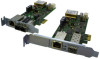
Lantronix N-GXE-POE-xx-01 User Guide Installation The following instructions apply to installing the N-GXE-POE-xx-01 in most systems. Refer to the manuals that were supplied with your system for details about performing these tasks on your particular system. Ensure that the PC enclosure provides sufficient airflow, especially if PoE+ loads will be powered over extended periods. Caution: Wear a grounding device and observe electrostatic discharge precautions when installing the N-GXE-POE-xx-01 in a system. Failure to observe this caution could result in damage to the N-GXEPOE-xx-01. To install the N-GXE-POE-xx-01, perform the following procedure: 1. Review the "Pre-Installation Checklist" and "Safety Precautions" sections of this manual. 2. Before installing the N-GXE-POE-xx-01, ensure that system power is OFF, the power cord is unplugged from the power outlet, and that proper electrical grounding procedures have been followed. Warning: High voltage inside the system presents a safety hazard. Make sure that the system power is off before removing the cover. Caution: unplug and disconnect the PC and then wait for 15-20 seconds before plugging the PoE NIC into the PC. 3. Remove the system cover and select an empty PCIe slot. If you do not know how to identify a PCIe slot, refer to your system documentation. 4. Select an empty, non-shared PCIe slot and remove the blank faceplate from the PC chassis. Keep the faceplate in a safe place as you may need it for future use. Note: If you cannot locate or know how to find a PCIe slot, refer to the manual that came with your system. 5. Remove the N-GXE-POE-xx-01 from the shipping package and store the packing material in a safe location. 6. If a power cable not available in the PC, refer to the Optional N-POE-CBLKIT. If required, connect one of the three optional power cables from the power supply on your system to the 4-pin mini-fit junior power connecter receptacle on the N-GXE-POE-xx-01. 7. Applying even pressure at both corners of the N-GXE-POE-xx-01, push the N-GXE-POE-xx-01 until it is firmly seated in the PCIe slot. Make sure the N-GXE-POE-xx-01 is securely seated. Caution: Do not use excessive force when seating the N-GXE-POE-xx-01, as the force may damage the system or the N-GXE-POE-xx-01. If the N-GXE-POE-xx-01 resists seating, remove it from the system, realign it, and try again. 8. Secure the N-GXE-POE-xx-01 to the chassis with a Phillips-head screw (not provided). 9. Replace the system's cover and secure it with the screws removed in step 3 of this procedure. 10. Disconnect any personal antistatic devices. 11. Power the system on. Note: If you installed the N-GXE-POE-xx-01 before installing the driver software, the Found New Hardware Wizard may launch. For more information, see Install the Driver Software on page 25. When the system returns to proper operation, the adapter hardware is fully installed. Next, connect the network cables. See Connect the Network Cables below. 33599 Rev. F https://www.lantronix.com/ Page 23 of 33
-
 1
1 -
2
-
3
-
4
-
5
-
6
-
7
-
8
-
9
-
10
-
11
-
12
-
13
-
14
-
15
-
16
-
17
-
 18
18 -
 19
19 -
 20
20 -
 21
21 -
 22
22 -
 23
23 -
 24
24 -
 25
25 -
 26
26 -
 27
27 -
 28
28 -
29
-
30
-
31
-
32
-
33
 |
 |
