Lenovo 9486F2U User Guide - Page 21
the cables to the drive installed. Refer to the appropriate
 |
UPC - 884343247014
View all Lenovo 9486F2U manuals
Add to My Manuals
Save this manual to your list of manuals |
Page 21 highlights
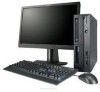
the cables to the drive installed. Refer to the appropriate section in Chapter 2, "Installing or replacing hardware," on page 15 for instructions on how to install or replace internal drives for your computer. Figure 5 shows the locations of the drive bays. Figure 5. Drive bay locations 1 Bay 1 - Optical drive bay (with an optical drive installed) 2 Bay 2 - Hard disk drive bay (with a 3.5-inch SATA hard disk drive installed) 3 Bay 3 - Diskette drive bay (available in some models) Chapter 1. Product overview 13
-
 1
1 -
2
-
3
-
4
-
5
-
6
-
7
-
8
-
9
-
10
-
11
-
12
-
13
-
14
-
15
-
 16
16 -
 17
17 -
 18
18 -
 19
19 -
 20
20 -
 21
21 -
 22
22 -
 23
23 -
 24
24 -
 25
25 -
 26
26 -
27
-
28
-
29
-
30
-
31
-
32
-
33
-
34
-
35
-
36
-
37
-
38
-
39
-
40
-
41
-
42
-
43
-
44
-
45
-
46
-
47
-
48
-
49
-
50
-
51
-
52
-
53
-
54
-
55
-
56
-
57
-
58
-
59
-
60
-
61
-
62
-
63
-
64
-
65
-
66
-
67
-
68
-
69
-
70
-
71
-
72
-
73
-
74
-
75
-
76
-
77
-
78
-
79
-
80
-
81
-
82
 |
 |

the cables to the drive installed. Refer to the appropriate section in Chapter 2,
“Installing or replacing hardware,” on page 15 for instructions on how to install or
replace internal drives for your computer.
Figure 5 shows the locations of the drive bays.
±1²
Bay 1 - Optical drive bay (with an optical drive installed)
±2²
Bay 2 - Hard disk drive bay (with a 3.5-inch SATA hard disk drive installed)
±3²
Bay 3 - Diskette drive bay (available in some models)
Figure 5. Drive bay locations
Chapter 1. Product overview
13