Lenovo Aptiva Product guide for Aptiva 6864 machine. - Page 76
Installing Internal Drives, Removing the Front Cover
 |
View all Lenovo Aptiva manuals
Add to My Manuals
Save this manual to your list of manuals |
Page 76 highlights
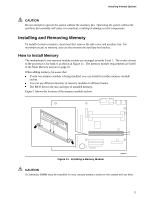
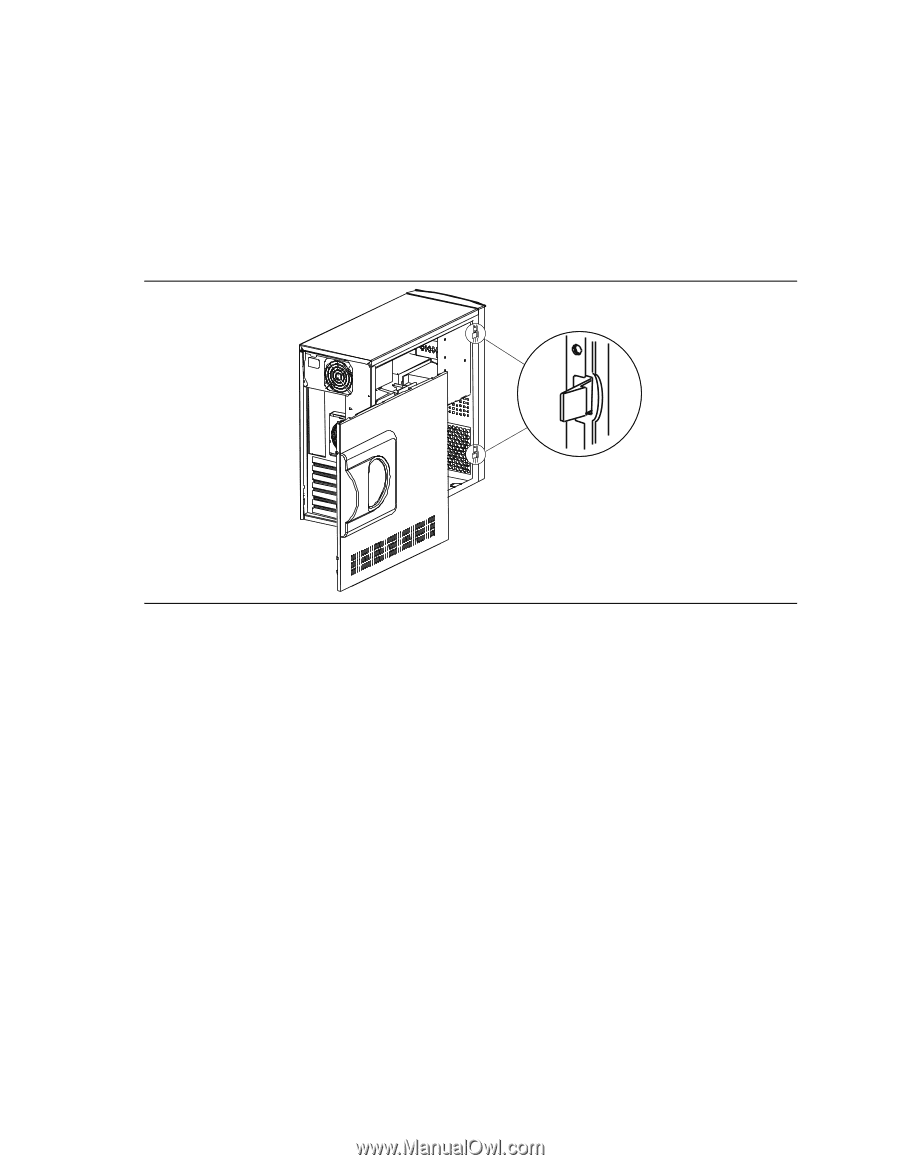
Aptiva S Series 1G Product Guide Installing Internal Drives To install an internal drive, you must first remove the side cover and then remove the front cover. To remove the front cover: 1. Push the plastic locking tabs (visible at the front corner of the system with the side cover removed) inward. 2. Rotate the front cover away from the front of the system. Figure 14. Removing the Front Cover 3. Disengage the tabs on the other side of the front cover from their slots on the chassis frame and set the front cover aside. 76
-
 1
1 -
2
-
3
-
4
-
5
-
6
-
7
-
8
-
9
-
10
-
11
-
12
-
13
-
14
-
15
-
16
-
17
-
18
-
19
-
20
-
21
-
22
-
23
-
24
-
25
-
26
-
27
-
28
-
29
-
30
-
31
-
32
-
33
-
34
-
35
-
36
-
37
-
38
-
39
-
40
-
41
-
42
-
43
-
44
-
45
-
46
-
47
-
48
-
49
-
50
-
51
-
52
-
53
-
54
-
55
-
56
-
57
-
58
-
59
-
60
-
61
-
62
-
63
-
64
-
65
-
66
-
67
-
68
-
69
-
70
-
 71
71 -
 72
72 -
 73
73 -
 74
74 -
 75
75 -
 76
76 -
 77
77 -
 78
78 -
 79
79 -
 80
80 -
 81
81
 |
 |
Aptiva S Series 1G Product Guide
76
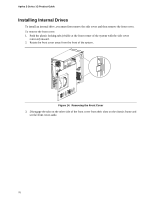
Installing Internal Drives
To install an internal drive, you must first remove the side cover and then remove the front cover.
To remove the front cover:
1.
Push the plastic locking tabs (visible at the front corner of the system with the side cover
removed) inward.
2.
Rotate the front cover away from the front of the system.
Figure 14.
Removing the Front Cover
3.
Disengage the tabs on the other side of the front cover from their slots on the chassis frame and
set the front cover aside.