Lenovo C100 Lenovo 3000 C100 Hardware Maintenance Manual (Windows 7) - Page 43
Replacing the system board
 |
UPC - 884942560453
View all Lenovo C100 manuals
Add to My Manuals
Save this manual to your list of manuals |
Page 43 highlights
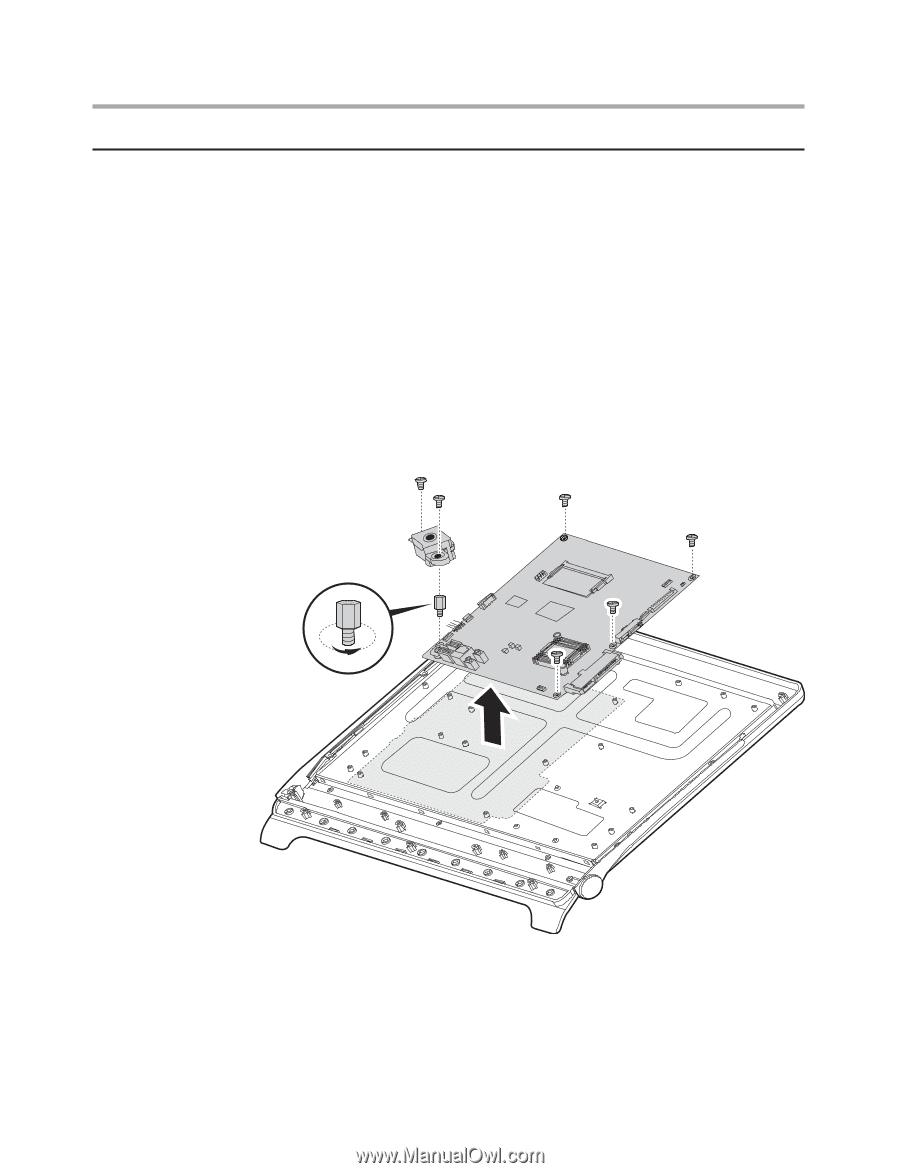
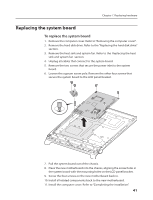
Chapter 7. Replacing hardware Replacing the system board To replace the system board 1. Remove the computer cover. Refer to "Removing the computer cover". 2. Remove the hard disk drive. Refer to the "Replacing the hard disk drive" section. 3. Remove the heat sink and system fan. Refer to the Replacing the heat sink and system fan section. 4. Unplug all cables that connect to the system board. 5. Remove the two screws that secure the power inlet to the system board. 6. Loosen the cuprum screw pole. Remove the other four screws that secure the system board to the LCD panel bracket. 7. Pull the system board out of the chassis. 8. Place the new motherboard into the chassis, aligning the screw holes in the system board with the mounting holes on the LCD panel bracket. 9. Screw the four screws on the new motherboard back in. 10. Install all related components back to the new motherboard. 11. Install the computer cover. Refer to "Completing the installation". 41
-
 1
1 -
2
-
3
-
4
-
5
-
6
-
7
-
8
-
9
-
10
-
11
-
12
-
13
-
14
-
15
-
16
-
17
-
18
-
19
-
20
-
21
-
22
-
23
-
24
-
25
-
26
-
27
-
28
-
29
-
30
-
31
-
32
-
33
-
34
-
35
-
36
-
37
-
 38
38 -
 39
39 -
 40
40 -
 41
41 -
 42
42 -
 43
43 -
 44
44 -
 45
45 -
 46
46 -
 47
47 -
 48
48 -
49
-
50
-
51
-
52
 |
 |