Lenovo H50-55 Lenovo H50 Series Hardware Maintenance Manual - Page 44
secured in the slot and does not move easily.
 |
View all Lenovo H50-55 manuals
Add to My Manuals
Save this manual to your list of manuals |
Page 44 highlights
Step 7. Remove the memory module being replaced by opening the retaining clips as shown. Step 8. Insert the notched end 1 of the new memory module into the slot. Press the memory module firmly and pivot the memory module until it snaps into place. Make sure that the memory module is secured in the slot and does not move easily. Step 9. For Lenovo H50-05, H50-50 and H50-55refer to the below instructions: Step 10. Remove the memory module being replaced by opening the retaining clips as shown. 38 Lenovo H50 SeriesHardware Maintenance Manual
-
 1
1 -
2
-
3
-
4
-
5
-
6
-
7
-
8
-
9
-
10
-
11
-
12
-
13
-
14
-
15
-
16
-
17
-
18
-
19
-
20
-
21
-
22
-
23
-
24
-
25
-
26
-
27
-
28
-
29
-
30
-
31
-
32
-
33
-
34
-
35
-
36
-
37
-
38
-
 39
39 -
 40
40 -
 41
41 -
 42
42 -
 43
43 -
 44
44 -
 45
45 -
 46
46 -
 47
47 -
 48
48 -
 49
49 -
50
-
51
-
52
-
53
-
54
-
55
-
56
-
57
-
58
-
59
-
60
-
61
-
62
-
63
-
64
-
65
-
66
-
67
-
68
-
69
-
70
-
71
-
72
-
73
-
74
-
75
-
76
-
77
-
78
-
79
-
80
-
81
-
82
-
83
-
84
-
85
-
86
-
87
-
88
-
89
-
90
-
91
 |
 |

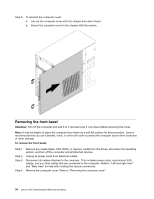
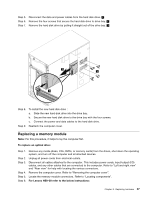
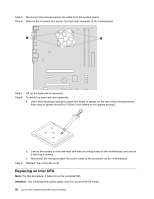
Step 7.
Remove the memory module being replaced by opening the retaining clips as shown.
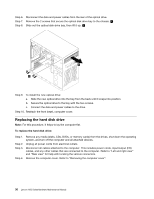
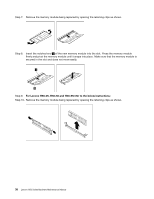
Step 8.
Insert the notched end
1
of the new memory module into the slot. Press the memory module
firmly and pivot the memory module until it snaps into place. Make sure that the memory module is
secured in the slot and does not move easily.
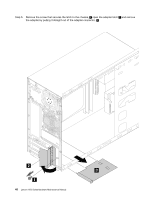
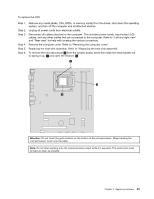
Step 9.
ForLenovoH50–05,H50–50andH50–55refertothebelowinstructions:
Step 10. Remove the memory module being replaced by opening the retaining clips as shown.
38
Lenovo H50 SeriesHardware Maintenance Manual