Lenovo IdeaCentre B300 Lenovo IdeaCentre B3 Series Hardware Replacement Guide - Page 17
Replacing the hard disk drive
 |
View all Lenovo IdeaCentre B300 manuals
Add to My Manuals
Save this manual to your list of manuals |
Page 17 highlights
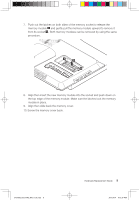
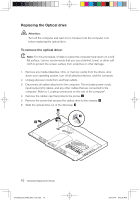
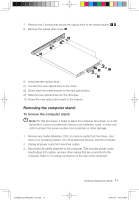
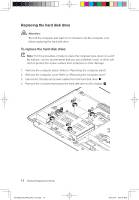
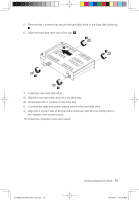
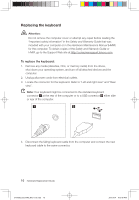
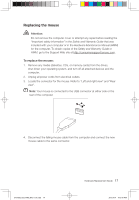
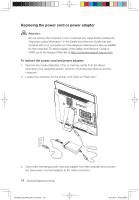
Replacing the hard disk drive Attention: Turn off the computer and wait 3 to 5 minutes to let the computer cool before replacing the hard disk drive. To replace the hard disk drive: Note: For this procedure, it helps to place the computer face-down on a soft flat surface. Lenovo recommends that you use a blanket, towel, or other soft cloth to protect the screen surface from scratches or other damage. 1. Remove the computer stand. Refer to "Removing the computer stand". 2. Remove the computer cover. Refer to "Removing the computer cover". 3. Disconnect the data and power cables from the hard disk drive. 4. Remove the 4 screws that secure the hard disk drive to the chassis. 2 1 2 2 2 14 Hardware Replacement Guide 31043502_B3_HRG_EN_V1.0.indd 14 2010.4.14 4:13:47 PM
-
 1
1 -
2
-
3
-
4
-
5
-
6
-
7
-
8
-
9
-
10
-
11
-
 12
12 -
 13
13 -
 14
14 -
 15
15 -
 16
16 -
 17
17 -
 18
18 -
 19
19 -
 20
20 -
 21
21 -
 22
22 -
23
 |
 |
