Lenovo ThinkPad 11e Hardware Maintenance Manual - Page 56
Retaining serial numbers, Restoring the serial number of the system unit, Plastic to plastic
 |
View all Lenovo ThinkPad 11e manuals
Add to My Manuals
Save this manual to your list of manuals |
Page 56 highlights
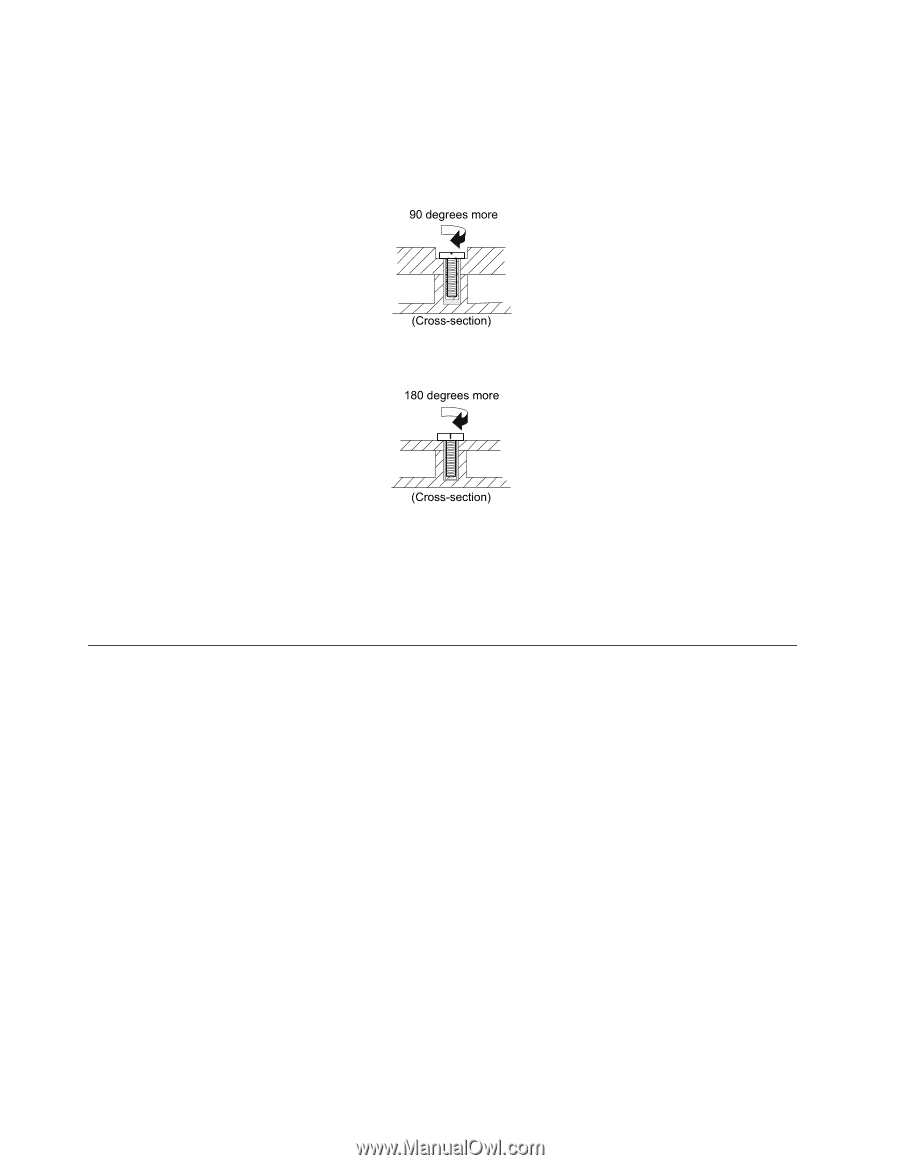
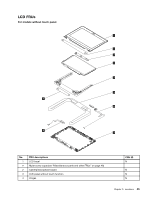
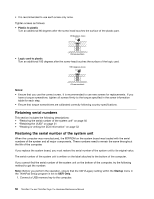
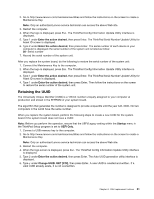
• It is recommended to use each screw only once. Tighten screws as follows: • Plastic to plastic Turn an additional 90 degrees after the screw head touches the surface of the plastic part. 90 degrees more (Cross-section) • Logic card to plastic Turn an additional 180 degrees after the screw head touches the surface of the logic card. 180 degrees more (Cross-section) Notes: • Ensure that you use the correct screw. It is recommended to use new screws for replacements. If you have a torque screwdriver, tighten all screws firmly to the torque specified in the screw information table for each step. • Ensure that torque screwdrivers are calibrated correctly following country specifications. Retaining serial numbers This section includes the following descriptions: • "Restoring the serial number of the system unit" on page 50 • "Retaining the UUID" on page 51 • "Reading or writing the ECA information" on page 52 Restoring the serial number of the system unit When the computer was manufactured, the EEPROM on the system board was loaded with the serial numbers of the system and all major components. These numbers need to remain the same throughout the life of the computer. If you replace the system board, you must restore the serial number of the system unit to its original value. The serial number of the system unit is written on the label attached to the bottom of the computer. If you cannot find the serial number of the system unit on the bottom of the computer, try the following method to get the number: Note: Before you perform the operation, ensure that the UEFI/Legacy setting within the Startup menu in the ThinkPad Setup program is set to UEFI Only. 1. Connect a USB memory key to the computer. 50 ThinkPad 11e and ThinkPad Yoga 11e Hardware Maintenance Manual
-
 1
1 -
2
-
3
-
4
-
5
-
6
-
7
-
8
-
9
-
10
-
11
-
12
-
13
-
14
-
15
-
16
-
17
-
18
-
19
-
20
-
21
-
22
-
23
-
24
-
25
-
26
-
27
-
28
-
29
-
30
-
31
-
32
-
33
-
34
-
35
-
36
-
37
-
38
-
39
-
40
-
41
-
42
-
43
-
44
-
45
-
46
-
47
-
48
-
49
-
50
-
 51
51 -
 52
52 -
 53
53 -
 54
54 -
 55
55 -
 56
56 -
 57
57 -
 58
58 -
 59
59 -
 60
60 -
 61
61 -
62
-
63
-
64
-
65
-
66
-
67
-
68
-
69
-
70
-
71
-
72
-
73
-
74
-
75
-
76
-
77
-
78
-
79
-
80
-
81
-
82
-
83
-
84
-
85
-
86
-
87
-
88
-
89
-
90
-
91
-
92
-
93
-
94
 |
 |