Lenovo ThinkPad E550 (English) Hardware Maintenance Manual - ThinkPad E550, E5 - Page 69
Retaining the UUID, Entertheactiondesired, Startup, UEFI Only, Change UUID. OK? [Y/N]
 |
View all Lenovo ThinkPad E550 manuals
Add to My Manuals
Save this manual to your list of manuals |
Page 69 highlights
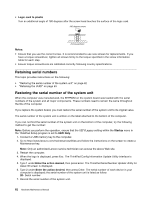
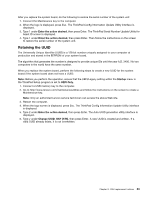
After you replace the system board, do the following to restore the serial number of the system unit: 1. Connect the Maintenance key to the computer. 2. When the logo is displayed, press Esc. The ThinkPad Config Information Update Utility interface is displayed. 3. Type 1 under Enter the action desired, then press Enter. The ThinkPad Serial Number Update Utility for Asset ID screen is displayed. 4. Type 1 under Enter the action desired, then press Enter. Then follow the instructions on the screen to restore the serial number of the system unit. Retaining the UUID The Universally Unique Identifier (UUID) is a 128-bit number uniquely assigned to your computer at production and stored in the EEPROM of your system board. The algorithm that generates the number is designed to provide unique IDs until the year A.D. 3400. No two computers in the world have the same number. When you replace the system board, perform the following steps to create a new UUID for the system board if the system board does not have a UUID: Note: Before you perform the operation, ensure that the UEFI/Legacy setting within the Startup menu in the ThinkPad Setup program is set to UEFI Only. 1. Connect a USB memory key to the computer. 2. Go to http://www.lenovo.com/maintenanceutilities and follow the instructions on the screen to create a Maintenance key. Note: Only an authorized Lenovo service technician can access the above Web site. 3. Restart the computer. 4. When the logo screen is displayed, press Esc. The ThinkPad Config Information Update Utility interface is displayed. 5. Type 2 under Enter the action desired, then press Enter. The Auto UUID generation utility interface is displayed. 6. Type y under Change UUID. OK? [Y/N], then press Enter. A new UUID is created and written. If a valid UUID already exists, it is not overwritten. Chapter 8. FRU replacement notices 63
-
 1
1 -
2
-
3
-
4
-
5
-
6
-
7
-
8
-
9
-
10
-
11
-
12
-
13
-
14
-
15
-
16
-
17
-
18
-
19
-
20
-
21
-
22
-
23
-
24
-
25
-
26
-
27
-
28
-
29
-
30
-
31
-
32
-
33
-
34
-
35
-
36
-
37
-
38
-
39
-
40
-
41
-
42
-
43
-
44
-
45
-
46
-
47
-
48
-
49
-
50
-
51
-
52
-
53
-
54
-
55
-
56
-
57
-
58
-
59
-
60
-
61
-
62
-
63
-
 64
64 -
 65
65 -
 66
66 -
 67
67 -
 68
68 -
 69
69 -
 70
70 -
 71
71 -
 72
72 -
 73
73 -
 74
74 -
75
-
76
-
77
-
78
-
79
-
80
-
81
-
82
-
83
-
84
-
85
-
86
-
87
-
88
-
89
-
90
-
91
-
92
-
93
-
94
-
95
-
96
-
97
-
98
-
99
-
100
-
101
-
102
-
103
-
104
-
105
-
106
-
107
-
108
-
109
-
110
-
111
-
112
 |
 |