Lenovo ThinkPad Z60m User Manual - Page 32
Checkout, guide, Testing, computer
 |
View all Lenovo ThinkPad Z60m manuals
Add to My Manuals
Save this manual to your list of manuals |
Page 32 highlights
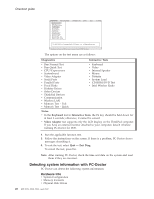
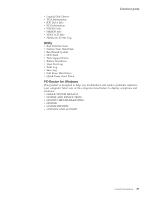
Checkout guide Checkout guide Use the following procedures as a guide in identifying and correcting problems with the ThinkPad computer. Note: The diagnostic tests are intended to test only ThinkPad products. The use of non-ThinkPad products, prototype cards, or modified options can lead to false indications of errors and invalid system responses. 1. Identify the failing symptoms in as much detail as possible. 2. Verify the symptoms. Try to re-create the failure by running the diagnostic test or by repeating the operation. Testing the computer The ThinkPad computer has a test program called PC-Doctor® DOS (hereafter called PC-Doctor.) You can detect errors by running the diagnostics test included in PC-Doctor. This section is an overview of the procedure. For details that depend on model-unique functions, refer to "Product overview" on page 34. For some possible configurations of the computer, PC-Doctor might not run correctly. To avoid this problem, you need to initialize the computer setup by use of the BIOS Setup Utility before you run PC-Doctor. On the BIOS Setup Utility screen, press F9, Enter, F10, and then Enter. Note: When you initialize the computer configuration, some devices are disabled, such as the serial port. If you test one of these devices, you will need to enable it by using PS2.EXE. PC-Doctor cannot be used to test a device that is in the docking station, even if the computer supports the docking station. To test a USB device, connect it to the USB connector of the computer. Creating the PC-Doctor diagnostics diskette To create the PC-Doctor disk from the ThinkVantage Predesktop Area, do as follows: 1. Enter the Predesktop application by pressing the ThinkVantage button during POST. 2. When the Access application finishes loading, double-click the "Create Diagnostic Diskettes" icon. 3. Authenticating the digital signature takes about 15 seconds; then the ThinkPad computer will reboot into PC-DOS. 4. A batch file automatically starts up to prompt you through the process of creating diskettes. You are notified of how many diskettes you will need. a. You are prompted to insert each diskette in sequence. b. Typically, all you need to do is to press the Enter key for the floppy drive; the system then formats and creates the diskette. c. Each diskette is erased and formatted with the PC-Doctor for DOS boot image. 5. Once all the diskettes have been created, the ThinkPad computer will reboot. The user is asked to remove all diskettes from the drive, or to insert the first diskette created if it is desired to run the diagnostics. To run the test, do as follows: 26 MT 2529, 2530, 2531, and 2532
-
 1
1 -
2
-
3
-
4
-
5
-
6
-
7
-
8
-
9
-
10
-
11
-
12
-
13
-
14
-
15
-
16
-
17
-
18
-
19
-
20
-
21
-
22
-
23
-
24
-
25
-
26
-
 27
27 -
 28
28 -
 29
29 -
 30
30 -
 31
31 -
 32
32 -
 33
33 -
 34
34 -
 35
35 -
 36
36 -
 37
37 -
38
-
39
-
40
-
41
-
42
-
43
-
44
-
45
-
46
-
47
-
48
-
49
-
50
-
51
-
52
-
53
-
54
-
55
-
56
-
57
-
58
-
59
-
60
-
61
-
62
-
63
-
64
-
65
-
66
-
67
-
68
-
69
-
70
-
71
-
72
-
73
-
74
-
75
-
76
-
77
-
78
-
79
-
80
-
81
-
82
-
83
-
84
-
85
-
86
-
87
-
88
-
89
-
90
-
91
-
92
-
93
-
94
-
95
-
96
-
97
-
98
-
99
-
100
-
101
-
102
-
103
-
104
-
105
-
106
-
107
-
108
-
109
-
110
-
111
-
112
-
113
-
114
-
115
-
116
-
117
-
118
-
119
-
120
-
121
-
122
-
123
-
124
-
125
-
126
-
127
-
128
-
129
-
130
-
131
-
132
-
133
-
134
-
135
-
136
-
137
-
138
-
139
-
140
-
141
-
142
-
143
-
144
-
145
-
146
-
147
-
148
-
149
-
150
-
151
-
152
-
153
-
154
-
155
-
156
-
157
-
158
-
159
-
160
-
161
-
162
-
163
-
164
 |
 |
