Lexmark 20D0000 User's Guide - Page 25
Setting the network options (X342n only), MACHINE SETUP, Timeout, Ready, NETWORK SETUP, Enable DHCP
 |
UPC - 734646026956
View all Lexmark 20D0000 manuals
Add to My Manuals
Save this manual to your list of manuals |
Page 25 highlights
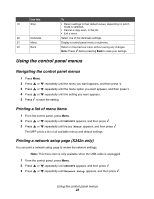
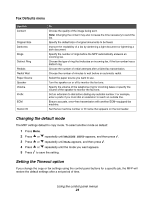
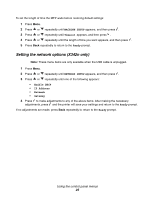
To set the length of time the MFP waits before restoring default settings: 1 Press Menu. 2 Press or repeatedly until MACHINE SETUP appears, and then press . 3 Press or repeatedly until Timeout appears, and then press . 4 Press or repeatedly until the length of time you want appears, and then press . 5 Press Back repeatedly to return to the Ready prompt. Setting the network options (X342n only) Note: These menu items are only available when the USB cable is unplugged. 1 Press Menu. 2 Press or repeatedly until NETWORK SETUP appears, and then press . 3 Press or repeatedly until one of the following appears: • Enable DHCP • IP Address • Netmask • Gateway 4 Press to make adjustments to any of the above items. After making the necessary adjustments, press and the printer will save your settings and return to the Ready prompt. If no adjustments are made, press Back repeatedly to return to the Ready prompt. Using the control panel menus 25
-
 1
1 -
2
-
3
-
4
-
5
-
6
-
7
-
8
-
9
-
10
-
11
-
12
-
13
-
14
-
15
-
16
-
17
-
18
-
19
-
 20
20 -
 21
21 -
 22
22 -
 23
23 -
 24
24 -
 25
25 -
 26
26 -
 27
27 -
 28
28 -
 29
29 -
 30
30 -
31
-
32
-
33
-
34
-
35
-
36
-
37
-
38
-
39
-
40
-
41
-
42
-
43
-
44
-
45
-
46
-
47
-
48
-
49
-
50
-
51
-
52
-
53
-
54
-
55
-
56
-
57
-
58
-
59
-
60
-
61
-
62
-
63
-
64
-
65
-
66
-
67
-
68
-
69
-
70
-
71
-
72
-
73
-
74
-
75
-
76
-
77
-
78
-
79
-
80
-
81
-
82
-
83
-
84
-
85
-
86
-
87
-
88
-
89
-
90
-
91
-
92
-
93
-
94
-
95
-
96
-
97
-
98
-
99
-
100
-
101
-
102
-
103
-
104
-
105
 |
 |
