Lexmark Apps Background and Idle Screen Admin Guide - Page 8
Configuring Background and Idle Screen, Adding idle screen and background images - applications
 |
View all Lexmark Apps manuals
Add to My Manuals
Save this manual to your list of manuals |
Page 8 highlights
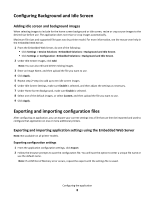
Configuring Background and Idle Screen Adding idle screen and background images When selecting images to include for the home screen background or idle screen, resize or crop source images to the desired size before use. The application does not resize or crop images automatically. Maximum file sizes and supported file types vary by printer model. For more information, see the mouse-over help in the Embedded Web Server. 1 From the Embedded Web Server, do one of the following: • Click Settings > Device Solutions >Embedded Solutions > Background and Idle Screen. • Click Settings or Configuration >Embedded Solutions > Background and Idle Screen. 2 Under Idle Screen Images, click Add. Note: You can also edit and delete existing images. 3 Enter an Image Name, and then upload the file you want to use. 4 Click Apply. 5 Repeat step 2-step 4 to add up to ten idle screen images. 6 Under Idle Screen Settings, make sure Enable is selected, and then adjust the settings as necessary. 7 Under Home Screen Background, make sure Enable is selected. 8 Select one of the default images, or select Custom, and then upload the file you want to use. 9 Click Apply. Exporting and importing configuration files After configuring an application, you can export your current settings into a file that can then be imported and used to configure that application on one or more additional printers. Exporting and importing application settings using the Embedded Web Server Note: Not available on all printer models. Exporting configuration settings 1 From the application configuration settings, click Export. 2 Follow the browser prompts to save the configuration file. You will have the option to enter a unique file name or use the default name. Note: If a JVM Out of Memory error occurs, repeat the export until the settings file is saved. Configuring the application 8
-
 1
1 -
2
-
 3
3 -
 4
4 -
 5
5 -
 6
6 -
 7
7 -
 8
8 -
 9
9 -
 10
10 -
 11
11 -
 12
12
 |
 |
