Lexmark B3442 Users Guide PDF - Page 24
Adding available options in the print driver, Networking, Connecting the printer to a Wi-Fi network
 |
View all Lexmark B3442 manuals
Add to My Manuals
Save this manual to your list of manuals |
Page 24 highlights
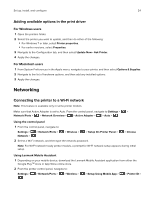
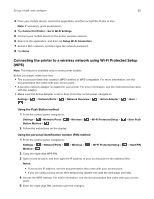
Set up, install, and configure 24 Adding available options in the print driver For Windows users 1 Open the printers folder. 2 Select the printer you want to update, and then do either of the following: • For Windows 7 or later, select Printer properties. • For earlier versions, select Properties. 3 Navigate to the Configuration tab, and then select Update Now ‑ Ask Printer. 4 Apply the changes. For Macintosh users 1 From System Preferences in the Apple menu, navigate to your printer, and then select Options & Supplies. 2 Navigate to the list of hardware options, and then add any installed options. 3 Apply the changes. Networking Connecting the printer to a Wi‑Fi network Note: This feature is available only in some printer models. Make sure that Active Adapter is set to Auto. From the control panel, navigate to Settings > > Network/Ports > > Network Overview > > Active Adapter > > Auto > Using the control panel 1 From the control panel, navigate to: Settings > Network > > Network/Ports > > Wireless > > Setup On Printer Panel > > Choose 2 Select a Wi‑Fi network, and then type the network password. Note: For Wi‑Fi‑network‑ready printer models, a prompt for Wi‑Fi network setup appears during initial setup. Using Lexmark Mobile Assistant 1 Depending on your mobile device, download the Lexmark Mobile Assistant application from either the Google PlayTM store or App Store online store. 2 From the printer control panel, navigate to: Settings > > Network/Ports > > Wireless > > Setup Using Mobile App > > Printer ID >
-
 1
1 -
2
-
3
-
4
-
5
-
6
-
7
-
8
-
9
-
10
-
11
-
12
-
13
-
14
-
15
-
16
-
17
-
18
-
 19
19 -
 20
20 -
 21
21 -
 22
22 -
 23
23 -
 24
24 -
 25
25 -
 26
26 -
 27
27 -
 28
28 -
 29
29 -
30
-
31
-
32
-
33
-
34
-
35
-
36
-
37
-
38
-
39
-
40
-
41
-
42
-
43
-
44
-
45
-
46
-
47
-
48
-
49
-
50
-
51
-
52
-
53
-
54
-
55
-
56
-
57
-
58
-
59
-
60
-
61
-
62
-
63
-
64
-
65
-
66
-
67
-
68
-
69
-
70
-
71
-
72
-
73
-
74
-
75
-
76
-
77
-
78
-
79
-
80
-
81
-
82
-
83
-
84
-
85
-
86
-
87
-
88
-
89
-
90
-
91
-
92
-
93
-
94
-
95
-
96
-
97
-
98
-
99
-
100
-
101
-
102
-
103
-
104
-
105
-
106
-
107
-
108
-
109
-
110
-
111
-
112
-
113
-
114
-
115
-
116
-
117
-
118
-
119
-
120
-
121
-
122
-
123
-
124
-
125
-
126
-
127
-
128
-
129
-
130
-
131
-
132
-
133
-
134
-
135
-
136
-
137
-
138
-
139
-
140
-
141
-
142
-
143
-
144
-
145
-
146
-
147
-
148
-
149
-
150
 |
 |
