Lexmark C500n User's Guide - Page 41
Ordering a fuser, Ordering a waste toner bottle, Ordering a photodeveloper cartridge, Replace Fuser
 |
View all Lexmark C500n manuals
Add to My Manuals
Save this manual to your list of manuals |
Page 41 highlights
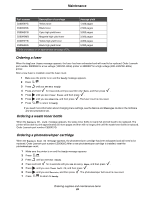
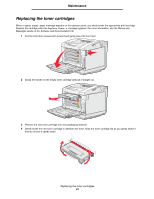
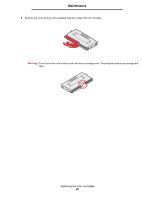
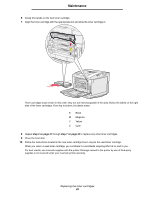
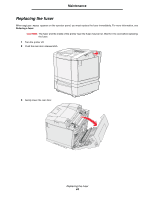
Maintenance Part number Description of cartridge C500S2YG Yellow toner C500S2KG Black toner C500H2CG Cyan high yield toner C500H2MG Magenta high yield toner C500H2YG Yellow high yield toner C500H2KG Black high yield toner Yields are based on an approximate coverage of 5%. Average yield 1,500 pages 2,500 pages 3,000 pages 3,000 pages 3,000 pages 5,000 pages Ordering a fuser When the Replace Fuser message appears, the fuser has been exhausted and will need to be replaced. Order Lexmark part number 20K0506 for a low-voltage (120V/50-60Hz) printer or 20K0507 for a high-voltage (220-240V/50-60Hz) printer. After a new fuser is installed, reset the fuser count. 1 Make sure the printer is on and the Ready message appears. 2 Press . 3 Press until you see Not Ready. 4 Press and hold for 3 seconds until you see Utility Menu, and then press . 5 Press until you see Clear Fuser, and then press . 6 Press until you see Execute, and then press .The fuser count is now reset. 7 Press to return to Ready. If you need more information about changing menu settings, see the Menus and Messages Guide on the Software and Documentation CD. Ordering a waste toner bottle When the Replace WT. Pack message appears, the waste toner bottle is nearly full and will need to be replaced. The printer will be able to print approximately 50 more pages and then will no longer print until the waste toner bottle is replaced. Order Lexmark part number C500X27G. Ordering a photodeveloper cartridge When the Replace Belt CG message appears, the photodeveloper cartridge has been exhausted and will need to be replaced. Order Lexmark part number C500X26G.After a new photodeveloper cartridge is installed, reset the photodeveloper count. 1 Make sure the printer is on and the Ready message appears. 2 Press . 3 Press until you see Not Ready. 4 Press and hold for 3 seconds until you see Utility Menu, and then press . 5 Press until you see Clear Belt CG, and then press . 6 Press until you see Execute, and then press .The photodeveloper belt count is now reset. 7 Press to return to Ready. Ordering supplies and maintenance items 39
-
 1
1 -
2
-
3
-
4
-
5
-
6
-
7
-
8
-
9
-
10
-
11
-
12
-
13
-
14
-
15
-
16
-
17
-
18
-
19
-
20
-
21
-
22
-
23
-
24
-
25
-
26
-
27
-
28
-
29
-
30
-
31
-
32
-
33
-
34
-
35
-
 36
36 -
 37
37 -
 38
38 -
 39
39 -
 40
40 -
 41
41 -
 42
42 -
 43
43 -
 44
44 -
 45
45 -
 46
46 -
47
-
48
-
49
-
50
-
51
-
52
-
53
-
54
-
55
-
56
-
57
-
58
-
59
-
60
-
61
-
62
-
63
-
64
-
65
-
66
-
67
-
68
-
69
-
70
-
71
-
72
-
73
-
74
-
75
-
76
-
77
-
78
-
79
-
80
-
81
-
82
-
83
-
84
 |
 |