Lexmark MC2325 Quick Reference - Page 6
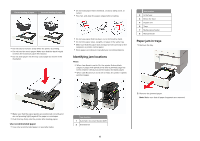
Identifying jam locations, Paper jam in trays
 |
View all Lexmark MC2325 manuals
Add to My Manuals
Save this manual to your list of manuals |
Page 6 highlights
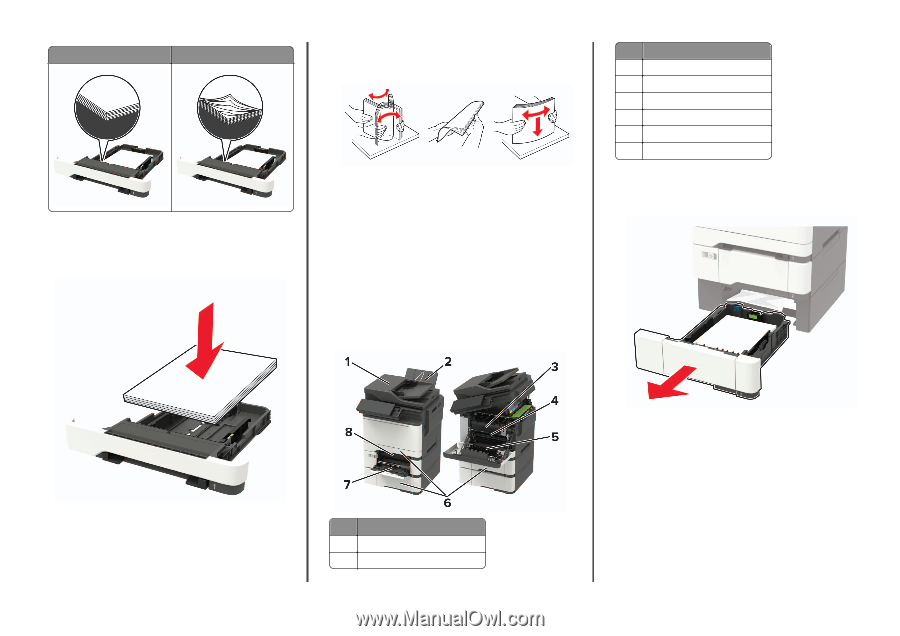
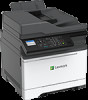
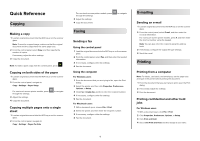
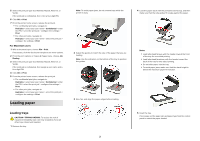
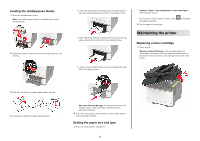
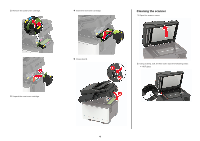
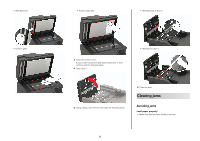
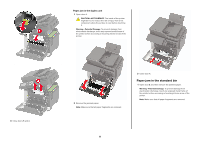
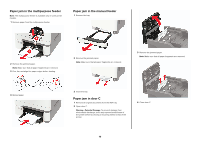
Correct loading of paper Incorrect loading of paper • Do not load or remove a tray while the printer is printing. • Do not load too much paper. Make sure that the stack height is below the maximum paper fill indicator. • Do not slide paper into the tray. Load paper as shown in the illustration. • Do not load paper that is wrinkled, creased, damp, bent, or curled. • Flex, fan, and align the paper edges before loading. • Do not use paper that has been cut or trimmed by hand. • Do not mix paper sizes, weights, or types in the same tray. • Make sure that the paper size and type are set correctly on the computer or printer control panel. • Store paper according to manufacturer recommendations. Identifying jam locations Notes: • When Jam Assist is set to On, the printer flushes blank pages or pages with partial prints after a jammed page has been cleared. Check your printed output for blank pages. • When Jam Recovery is set to On or Auto, the printer reprints jammed pages. Jam location 3 In the fuser 4 Below the fuser 5 Duplex unit 6 Trays 7 Multipurpose feeder 8 Manual feeder Paper jam in trays 1 Remove the tray. • Make sure that the paper guides are positioned correctly and are not pressing tightly against the paper or envelopes. • Push the tray firmly into the printer after loading paper. Use recommended paper • Use only recommended paper or specialty media. Jam location 1 Automatic document feeder (ADF) 2 Standard bin 6 2 Remove the jammed paper. Note: Make sure that all paper fragments are removed.
-
 1
1 -
 2
2 -
 3
3 -
 4
4 -
 5
5 -
 6
6 -
 7
7 -
 8
8 -
 9
9 -
 10
10
 |
 |