Lexmark MarkNet N7000e User's Guide for Macintosh - Page 11
Check the printer status, Change the print server network settings, Use a media drive, Finder - reset
 |
View all Lexmark MarkNet N7000e manuals
Add to My Manuals
Save this manual to your list of manuals |
Page 11 highlights
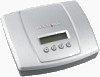
Check the printer status 1 From the Dock, click the Finder icon. 2 From the Finder window, click the Applications icon in the sidebar. 3 Double-click the Utilities folder. 4 Double-click Print Center or Print Setup Utility. 5 Select your printer in the printer list. 6 From the Printers menu, choose Make Default. 7 Double-click your printer in the printer list. 8 In the printer window, make sure that print jobs are not held or stopped. Change the print server network settings Once the IP address is assigned, you can access the print server homepage on the Web to remotely view and manage the network printer. Functions you can perform include viewing printer status, resetting the print server, changing settings, and so on. To access the Web page for your printer server: 1 Launch Safari. 2 From the Safari menu, choose Preferences. 3 From either the Bookmarks Bar or Bookmarks Menu, choose Include Rendezvous or Include Bonjour. 4 Click Rendezvous or Bonjour, and then choose the name of your printer. 5 Make changes as necessary. Use a media drive If your print server has USB port(s), you can insert your media drives and print files. 1 Insert your media drive, and then press . 2 Scroll to the file using the navigation buttons. Use and to navigate through a directory. 3 When the file you want to print appears, press . Note: If your print server is a four-port model, scroll to the desired port. Note: Some file types may not be supported by the attached printer and therefore may not print. How Do I?... 11
-
 1
1 -
2
-
3
-
4
-
5
-
 6
6 -
 7
7 -
 8
8 -
 9
9 -
 10
10 -
 11
11 -
 12
12 -
 13
13 -
 14
14 -
 15
15 -
 16
16 -
17
-
18
-
19
 |
 |
