Lexmark Network Printer Device MarkNet Internal Print Server Quick Start - Page 7
Step 4: Print a, network setup
 |
View all Lexmark Network Printer Device manuals
Add to My Manuals
Save this manual to your list of manuals |
Page 7 highlights
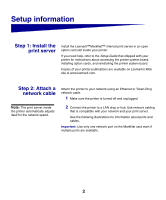
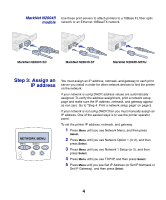
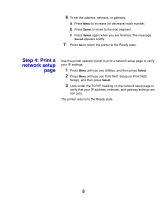
6 To set the address, netmask, or gateway: a Press Menu to increase (or decrease) each number. b Press Select to move to the next segment. c Press Select again when you are finished. The message Saved appears briefly. 7 Press Go to return the printer to the Ready state. Step 4: Print a network setup page Use the printer operator panel to print a network setup page to verify your IP settings. 1 Press Menu until you see Utilities, and then press Select. 2 Press Menu until you see Print Net1 Setup (or Print Net2 Setup), and then press Select. 3 Look under the TCP/IP heading on the network setup page to verify that your IP address, netmask, and gateway settings are non zero. The printer returns to the Ready state. 5
-
 1
1 -
 2
2 -
 3
3 -
 4
4 -
 5
5 -
 6
6 -
 7
7 -
 8
8 -
 9
9 -
 10
10 -
 11
11 -
 12
12 -
13
-
14
-
15
-
16
-
17
-
18
-
19
-
20
-
21
-
22
-
23
-
24
-
25
-
26
-
27
-
28
-
29
-
30
-
31
-
32
-
33
-
34
-
35
-
36
-
37
-
38
-
39
-
40
-
41
-
42
-
43
-
44
-
45
-
46
-
47
-
48
-
49
-
50
-
51
-
52
-
53
-
54
-
55
-
56
-
57
-
58
-
59
-
60
-
61
-
62
-
63
-
64
-
65
-
66
-
67
-
68
-
69
-
70
-
71
-
72
-
73
-
74
 |
 |

5
6
To set the address, netmask, or gateway:
a
Press
Menu
to increase (or decrease) each number.
b
Press
Select
to move to the next segment.
c
Press
Select
again when you are finished. The message
Saved
appears briefly.
7
Press
Go
to return the printer to the Ready state.
Step 4: Print a
network setup
page
Use the printer operator panel to print a network setup page to verify
your IP settings.
1
Press
Menu
until you see Utilities, and then press
Select
.
2
Press
Menu
until you see Print Net1 Setup (or Print Net2
Setup), and then press
Select
.
3
Look under the TCP/IP heading on the network setup page to
verify that your IP address, netmask, and gateway settings are
non zero.
The printer returns to the Ready state.