Lexmark X544 Wireless Setup Guide - Page 17
Suggested, Wireless Network Attach, Basic, Advanced
 |
View all Lexmark X544 manuals
Add to My Manuals
Save this manual to your list of manuals |
Page 17 highlights
5 Click Suggested. 6 Click Wireless Network Attach. 7 Remove the label covering the USB port on the back of the printer. 8 Temporarily connect a USB cable between the computer on the wireless network and the printer. Note: After the printer is configured, the software will instruct you to disconnect the temporary USB cable so you can print wirelessly. 9 Follow the on-screen instructions to complete the software installation. Note: Basic is the recommended path to choose. Choose Advanced only if you want to customize your installation. 10 To allow other computers on the wireless network to use the wireless printer, follow steps 2 through 6 and step 9 for each computer. Connecting to a wireless network using Windows 17
-
 1
1 -
2
-
3
-
4
-
5
-
6
-
7
-
8
-
9
-
10
-
11
-
 12
12 -
 13
13 -
 14
14 -
 15
15 -
 16
16 -
 17
17 -
 18
18 -
 19
19 -
 20
20 -
 21
21 -
 22
22 -
23
-
24
-
25
-
26
-
27
-
28
-
29
-
30
-
31
-
32
-
33
-
34
-
35
-
36
 |
 |

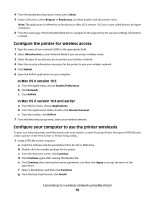
5
Click
Suggested
.
6
Click
Wireless Network Attach
.
7
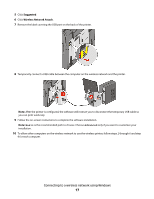
Remove the label covering the USB port on the back of the printer.
8
Temporarily connect a USB cable between the computer on the wireless network and the printer.
Note:
After the printer is configured, the software will instruct you to disconnect the temporary USB cable so
you can print wirelessly.
9
Follow the on-screen instructions to complete the software installation.
Note:
Basic
is the recommended path to choose. Choose
Advanced
only if you want to customize your
installation.
10
To allow other computers on the wireless network to use the wireless printer, follow steps 2 through 6 and step
9 for each computer.
Connecting to a wireless network using Windows
17