Lexmark X544 Wireless Setup Guide - Page 31
Run the Wireless Setup Utility again, Enter, Start, All Programs, Programs, Wireless Setup Utility - parts
 |
View all Lexmark X544 manuals
Add to My Manuals
Save this manual to your list of manuals |
Page 31 highlights
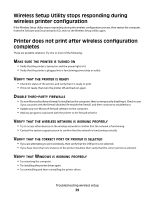
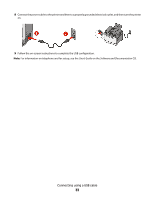
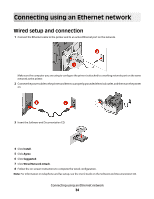
c Press Enter. • The "Default Gateway" entry is typically the access point. • The IP address appears as four sets of numbers separated by periods, such as 192.168.1.1. 2 Type the user name and password for the access point when prompted. 3 Click OK. 4 Locate the page where the SSID appears. 5 Write down the SSID, security type, and the WEP key or WPA passphrase, if they are shown. Note: Make sure you copy them down exactly, including any capital letters. Run the Wireless Setup Utility again 1 Do one of the following: • In Windows Vista, click . • In Windows XP and earlier, click Start. 2 Click All Programs or Programs, and then select the printer program folder from the list. 3 Click Wireless Setup Utility. Note: If the Wireless Setup Utility is not installed on the computer, then insert the Software and Documentation CD, and follow the wireless installation path. 4 Follow the instructions on the computer screen, including typing in the SSID of the wireless access point and the WEP key or WPA passphrase when prompted. Note: You may be prompted to connect the printer to the computer again using the installation cable as part of the setup process. 5 Store the SSID and the WEP key or WPA passphrase in a safe place for future reference. Troubleshooting wireless setup 31
-
 1
1 -
2
-
3
-
4
-
5
-
6
-
7
-
8
-
9
-
10
-
11
-
12
-
13
-
14
-
15
-
16
-
17
-
18
-
19
-
20
-
21
-
22
-
23
-
24
-
25
-
 26
26 -
 27
27 -
 28
28 -
 29
29 -
 30
30 -
 31
31 -
 32
32 -
 33
33 -
 34
34 -
 35
35 -
 36
36
 |
 |
