Lexmark X642E User's Guide - Page 59
Performing browser fax setup, Viewing a fax log, Enter, Configuration, Fax Setup, Submit, Reports
 |
UPC - 734646258746
View all Lexmark X642E manuals
Add to My Manuals
Save this manual to your list of manuals |
Page 59 highlights
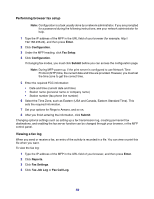
Performing browser fax setup Note: Configuration is a task usually done by a network administrator. If you are prompted for a password during the following instructions, see your network administrator for help. 1 Type the IP address of the MFP in the URL field of your browser (for example, http:// 192.168.236.24), and then press Enter. 2 Click Configuration. 3 Under the MFP heading, click Fax Setup. 4 Click Configuration. If changing fax modes, you must click Submit before you can access the configuration page. Note: During MFP power up, if the print server is configured to use Network Time Protocol (NTP) time, the current date and time are provided. However, you must set the time zone to get the correct time. 5 Enter the required FCC information: • Date and time (current date and time) • Station name (personal name or company name) • Station number (fax phone line number) 6 Select the Time Zone, such as Eastern (USA and Canada, Eastern Standard Time). This sets the required information. 7 Set your options for Rings to Answer, and so on. 8 After you finish entering the information, click Submit. Changing optional settings such as setting up a fax transmission log, creating permanent fax destinations, and enabling the fax server function can be changed through your browser, or the MFP control panel. Viewing a fax log When you send or receive a fax, an entry of the activity is recorded in a file. You can view or print this file when you want. To view the fax log: 1 Type the IP address of the MFP in the URL field of your browser, and then press Enter. 2 Click Reports. 3 Click Fax Settings. 4 Click Fax Job Log or Fax Call Log. 59
-
 1
1 -
2
-
3
-
4
-
5
-
6
-
7
-
8
-
9
-
10
-
11
-
12
-
13
-
14
-
15
-
16
-
17
-
18
-
19
-
20
-
21
-
22
-
23
-
24
-
25
-
26
-
27
-
28
-
29
-
30
-
31
-
32
-
33
-
34
-
35
-
36
-
37
-
38
-
39
-
40
-
41
-
42
-
43
-
44
-
45
-
46
-
47
-
48
-
49
-
50
-
51
-
52
-
53
-
 54
54 -
 55
55 -
 56
56 -
 57
57 -
 58
58 -
 59
59 -
 60
60 -
 61
61 -
 62
62 -
 63
63 -
 64
64 -
65
-
66
-
67
-
68
-
69
-
70
-
71
-
72
-
73
-
74
-
75
-
76
-
77
-
78
-
79
-
80
-
81
-
82
-
83
-
84
-
85
-
86
-
87
-
88
-
89
-
90
-
91
-
92
-
93
-
94
-
95
-
96
-
97
-
98
-
99
-
100
-
101
-
102
-
103
-
104
-
105
-
106
-
107
-
108
-
109
-
110
-
111
-
112
-
113
-
114
-
115
-
116
-
117
-
118
-
119
-
120
-
121
-
122
-
123
-
124
-
125
-
126
-
127
-
128
-
129
-
130
-
131
-
132
-
133
-
134
-
135
-
136
-
137
-
138
-
139
-
140
-
141
-
142
-
143
-
144
-
145
-
146
-
147
-
148
-
149
-
150
-
151
-
152
-
153
-
154
-
155
-
156
-
157
-
158
-
159
-
160
-
161
-
162
-
163
-
164
-
165
-
166
-
167
-
168
-
169
-
170
-
171
-
172
-
173
-
174
-
175
-
176
-
177
-
178
-
179
-
180
-
181
-
182
-
183
-
184
-
185
-
186
-
187
-
188
-
189
-
190
-
191
 |
 |