Lexmark X854E Setup Guide - Page 20
Installing memory, Installing a firmware, Installing an option card, Assemble paper handling options
 |
UPC - 734646002813
View all Lexmark X854E manuals
Add to My Manuals
Save this manual to your list of manuals |
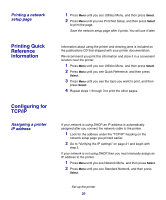
Page 20 highlights
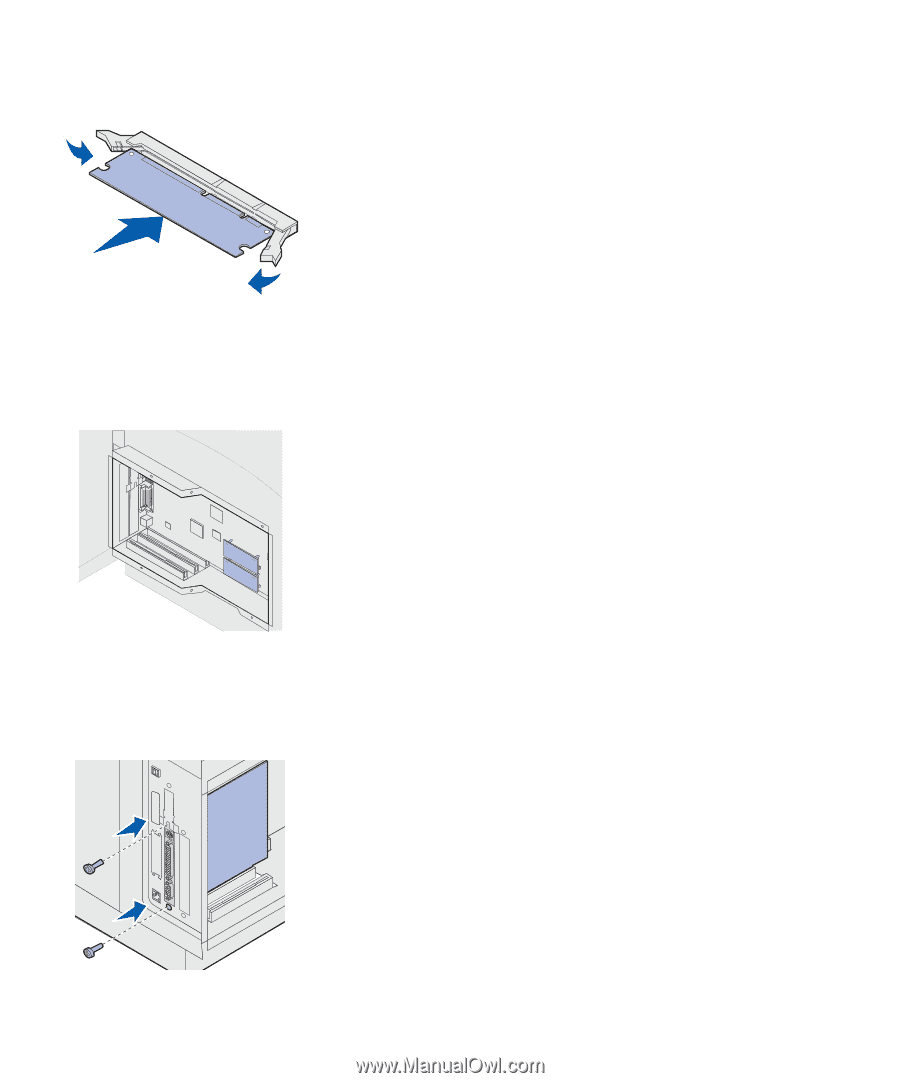
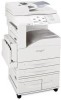
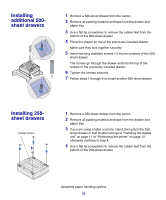
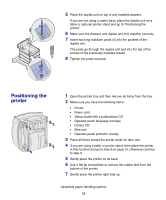
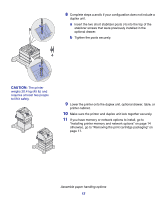
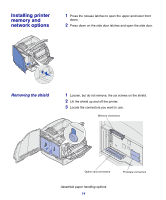
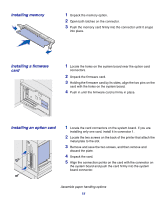
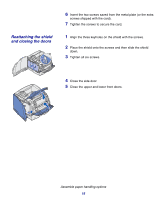
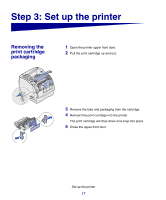
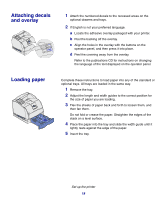
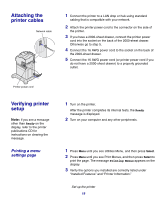
Installing memory 1 Unpack the memory option. 2 Open both latches on the connector. 3 Push the memory card firmly into the connector until it snaps into place. Installing a firmware card 1 Locate the holes on the system board near the option card connectors. 2 Unpack the firmware card. 3 Holding the firmware card by its sides, align the two pins on the card with the holes on the system board. 4 Push in until the firmware card is firmly in place. Installing an option card 1 Locate the card connectors on the system board. If you are installing only one card, install it in connector 1. 2 Locate the two screws on the back of the printer that attach the metal plate to the slot. 3 Remove and save the two screws, and then remove and discard the plate. 4 Unpack the card. 5 Align the connection points on the card with the connector on the system board and push the card firmly into the system board connector. Assemble paper handling options 15
-
 1
1 -
2
-
3
-
4
-
5
-
6
-
7
-
8
-
9
-
10
-
11
-
12
-
13
-
14
-
 15
15 -
 16
16 -
 17
17 -
 18
18 -
 19
19 -
 20
20 -
 21
21 -
 22
22 -
 23
23 -
 24
24 -
 25
25 -
26
-
27
-
28
-
29
-
30
-
31
-
32
-
33
-
34
-
35
-
36
-
37
-
38
-
39
-
40
-
41
-
42
-
43
-
44
-
45
-
46
-
47
-
48
-
49
-
50
-
51
-
52
-
53
-
54
-
55
-
56
-
57
 |
 |