Lexmark X854E Setup Guide - Page 36
Using your browser, Using MarkVision Professional, Enter, Configuration, Copy Setup, Submit, Con - drivers
 |
UPC - 734646002813
View all Lexmark X854E manuals
Add to My Manuals
Save this manual to your list of manuals |
Page 36 highlights
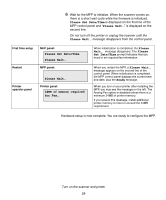
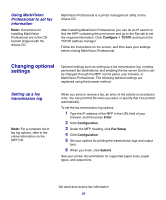
Using your browser Note: Many of these settings depend on the printer, options, and scanner combination you have. 1 Type the IP address of the MFP in the URL field of your browser (for example, http://192.168.236.24), and then press Enter. 2 Click Configuration. 3 Select Copy Setup from the MFP menu. The Copy Setup page has the following menu items available: • Content • Paper Saver • Duplex • Original Size • Scaling • Output Bin • Factory Defaults • Copy Media • N-up frame • Finishing • Copy Size • Default Darkness • Number of Copies • Copy Quality 4 Select the menu item for the setting you want to change. 5 Select the new setting and click Submit. 6 Repeat steps 1 through 5 to change additional settings. Using MarkVision Professional Note: Instructions for installing MarkVision Professional are in the CD booklet shipped with the drivers CD. MarkVision Professional is a printer management utility on the drivers CD. After installing MarkVision Professional, you can do an IP search to find the MFP containing the print server and go to the Copy tab to set the required information. Click Configure TCP/IP, and launch the TCP/IP address manager. Follow the instructions on the screen, and then save your settings before closing MarkVision Professional. Change your default copy settings 31
-
 1
1 -
2
-
3
-
4
-
5
-
6
-
7
-
8
-
9
-
10
-
11
-
12
-
13
-
14
-
15
-
16
-
17
-
18
-
19
-
20
-
21
-
22
-
23
-
24
-
25
-
26
-
27
-
28
-
29
-
30
-
 31
31 -
 32
32 -
 33
33 -
 34
34 -
 35
35 -
 36
36 -
 37
37 -
 38
38 -
 39
39 -
 40
40 -
 41
41 -
42
-
43
-
44
-
45
-
46
-
47
-
48
-
49
-
50
-
51
-
52
-
53
-
54
-
55
-
56
-
57
 |
 |