Lexmark Z603 User's Guide for Mac OS X - Page 35
Specifying cartridge settings in the printer software, Aligning the print cartridges - ink
 |
View all Lexmark Z603 manuals
Add to My Manuals
Save this manual to your list of manuals |
Page 35 highlights
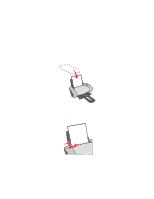
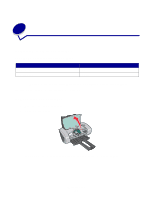
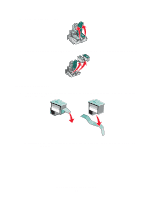
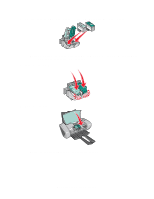
Specifying cartridge settings in the printer software Before you specify the print cartridge settings in the printer software, install the cartridges. For help, see "Install the cartridges" on page 33. 1 After installing the cartridges, open the printer utility by double-clicking the Z600 Series Printer folder on your desktop, and then double-clicking Z600 Series Utility. You can also access the Z600 Series Utility from Printer Services in the Print dialog menu. 2 From the Cartridges tab, click Install/Change Cartridge. Follow the instruction on the screen to install the cartridges. 3 Click Continue. The Cartridge Verification dialog appears. 4 Select the part numbers of the cartridges you are installing. 5 Select Yes, it is old if the cartridge has been used before, or No, it is new if the cartridge has not been used before. Note: If an old cartridge is incorrectly identified as new cartridge, ink levels in the Control Panel may be incorrect. 6 Click OK. Aligning the print cartridges Typically, you only align print cartridges after installing or replacing a cartridge. However, you may also need to align cartridges when: • Characters are improperly formed or are misaligned at the left margin. • Vertical, straight lines are wavy. To align the cartridges: 1 Load paper. 2 Access the printer utility by double-clicking the Z600 Series Printer folder on your desktop, and then double-clicking Z600 Series Utility. You can also access the Z600 Series Utility from Printer Services in the Print dialog menu. 3 From the Cartridges tab, click Align Cartridges. The Cartridge Alignment dialog appears. 4 Click Continue. 5 Find the number under the darkest arrow for each alignment group on the printed alignment page. Specifying cartridge settings in the printer software 35
-
 1
1 -
2
-
3
-
4
-
5
-
6
-
7
-
8
-
9
-
10
-
11
-
12
-
13
-
14
-
15
-
16
-
17
-
18
-
19
-
20
-
21
-
22
-
23
-
24
-
25
-
26
-
27
-
28
-
29
-
 30
30 -
 31
31 -
 32
32 -
 33
33 -
 34
34 -
 35
35 -
 36
36 -
 37
37 -
 38
38 -
 39
39 -
 40
40 -
41
-
42
-
43
-
44
-
45
-
46
-
47
-
48
-
49
-
50
-
51
-
52
-
53
-
54
-
55
-
56
-
57
-
58
-
59
-
60
-
61
-
62
-
63
 |
 |
