Lexmark lexmark J110 Setup Guide - Page 30
Verify setup - printer drivers
 |
View all Lexmark lexmark J110 manuals
Add to My Manuals
Save this manual to your list of manuals |
Page 30 highlights
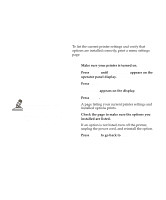
Step 9: Verify setup If you installed the tray 2 or multipurpose feeder option, be sure to update your printer configuration through your Windows printer driver. Refer to "Adding new hardware options" on the User's Guide CD for instructions. To list the current printer settings and verify that options are installed correctly, print a menu settings page. 1 Make sure your printer is turned on. 2 Press Menu> until Utilities Menu appears on the operator panel display. 3 Press Select. 4 Print Menus appears on the display. 5 Press Select. A page listing your current printer settings and installed options prints. 6 Check the page to make sure the options you installed are listed. If an option is not listed, turn off the printer, unplug the power cord, and reinstall the option. 7 Press Return to go back to Ready. Verify setup 27
-
 1
1 -
2
-
3
-
4
-
5
-
6
-
7
-
8
-
9
-
10
-
11
-
12
-
13
-
14
-
15
-
16
-
17
-
18
-
19
-
20
-
21
-
22
-
23
-
24
-
 25
25 -
 26
26 -
 27
27 -
 28
28 -
 29
29 -
 30
30 -
 31
31 -
 32
32 -
 33
33 -
 34
34 -
 35
35 -
36
-
37
-
38
-
39
-
40
-
41
-
42
-
43
-
44
-
45
-
46
-
47
-
48
 |
 |