Lexmark lexmark J110 Setup Guide - Page 34
Installing a Macintosh, printer driver, Select the Lexmark J110 icon. - drivers
 |
View all Lexmark lexmark J110 manuals
Add to My Manuals
Save this manual to your list of manuals |
Page 34 highlights
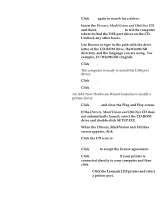
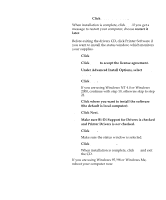
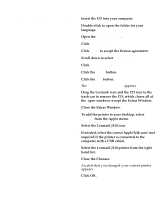
Installing a Macintosh printer driver 1 Insert the CD into your computer. 2 Double-click to open the folder for your language. 3 Open the Lexmark Installer. 4 Click Continue. 5 Click Agree to accept the license agreement. 6 Scroll down to select Custom Install. 7 Click Lexmark J110. 8 Click the Install button. 9 Click the Quit button. The Lexmark Extras Window appears. 10 Drag the Lexmark icon and the CD icon to the trash can to remove the CD, which closes all of the open windows except the Extras Window. 11 Close the Extras Window. 12 To add the printer to your desktop, select Chooser from the Apple menu. 13 Select the Lexmark J110 icon. 14 If needed, select the correct AppleTalk zone (not required if the printer is connected to the computer with a USB cable). 15 Select the Lexmark J110 printer from the right hand list. 16 Close the Chooser. An alert that you changed your current printer appears. 17 Click OK. Load printer drivers and MarkVision 31
-
 1
1 -
2
-
3
-
4
-
5
-
6
-
7
-
8
-
9
-
10
-
11
-
12
-
13
-
14
-
15
-
16
-
17
-
18
-
19
-
20
-
21
-
22
-
23
-
24
-
25
-
26
-
27
-
28
-
 29
29 -
 30
30 -
 31
31 -
 32
32 -
 33
33 -
 34
34 -
 35
35 -
 36
36 -
 37
37 -
 38
38 -
 39
39 -
40
-
41
-
42
-
43
-
44
-
45
-
46
-
47
-
48
 |
 |