LiftMaster 3265 3265M Manual - Page 17
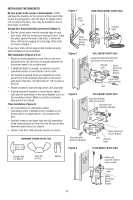
MOUNTING AND WIRING THE SAFETY REVERSING SENSORS, Mounting, Option A - Installation Without Pre-Wiring
 |
View all LiftMaster 3265 manuals
Add to My Manuals
Save this manual to your list of manuals |
Page 17 highlights
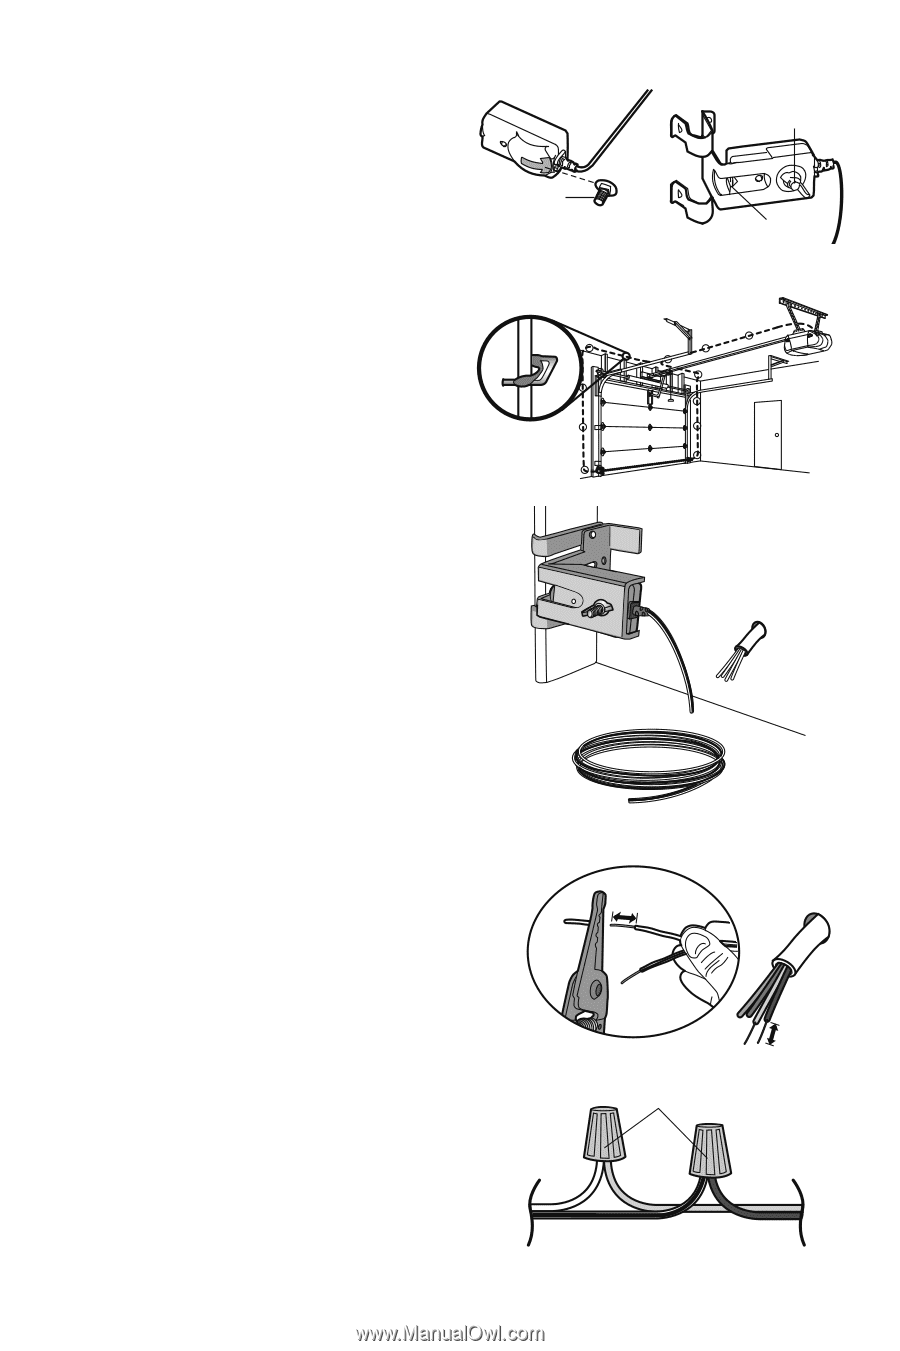
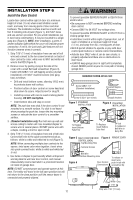
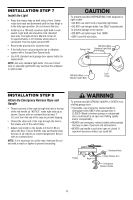
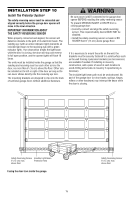
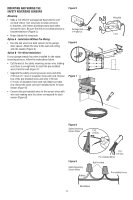
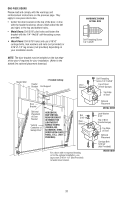
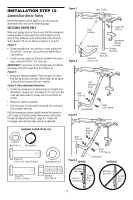
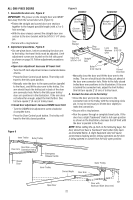
MOUNTING AND WIRING THE SAFETY REVERSING SENSORS Mounting: • Slide a 1/4"-20x1/2" carriage bolt head into the slot on each sensor. Use wing nuts to fasten sensors to brackets, with lenses pointing toward each other across the door. Be sure the lens is not obstructed by a bracket extension (Figure 5). • Finger tighten the wing nuts. Option A - Installation Without Pre-Wiring: • Run the bell wire from both sensors to the garage door opener. Attach the wire to the wall and ceiling with the staples (Figure 6). Option B - Pre-Wired Installation: If your garage already has wires installed for the safety reversing sensors, follow the instructions below: • Cut the end of the safety reversing sensor wire, making sure there is enough wire to reach the pre-installed wires from the wall (Figure 7). • Separate the safety reversing sensor wires and strip 7/16 inch (11 mm) of insulation from each end. Choose two of the pre-installed wires and strip 7/16 inch (11 mm) of insulation from each end. Make sure that you choose the same color pre-installed wires for each sensor (Figure 8). • Connect the pre-installed wires to the sensor wires with wire nuts making sure the colors correspond for each sensor (Figure 9). Figure 5 Carriage Bolt 1/4"-20x1/2" Figure 6 Figure 7 Wing Nut Lens Figure 8 Safety Reversing Sensor Wires 7/16" (11mm) Figure 9 Safety Reversing Sensor Wires White 7/16" (11mm) Pre-Installed Wires Not Provided Pre-installed wires White/Black 17
-
 1
1 -
2
-
3
-
4
-
5
-
6
-
7
-
8
-
9
-
10
-
11
-
 12
12 -
 13
13 -
 14
14 -
 15
15 -
 16
16 -
 17
17 -
 18
18 -
 19
19 -
 20
20 -
 21
21 -
 22
22 -
23
-
24
-
25
-
26
-
27
-
28
-
29
-
30
-
31
-
32
-
33
-
34
-
35
-
36
 |
 |