LiftMaster RSW12V RSW12V Install Manual - Page 16
Wiring - reviews
 |
View all LiftMaster RSW12V manuals
Add to My Manuals
Save this manual to your list of manuals |
Page 16 highlights
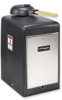
WIRING » POWER WIRING POWER WIRING This operator can be powered by the internal receptacle, an external receptacle or a solar panel (not provided). INTERNAL RECEPTACLE 120 VAC POWER WIRE (STRANDED COPPER WIRE) Wire Gauge 16 - 100 feet (30 m) Wire Gauge 10 - 1000 feet (305 m) NOTE: All power wiring should be on a dedicated circuit, calculated using NEC guidelines. National and local codes and conditions must be reviewed for suitability of wire installation. 1 Remove the access panel. 2 Connect AC power to the operator: Connect the green wire to the ground screw in the access panel. Connect the black and white wires together with wire nuts. HEATER WIRING: NOTE: If your operator comes with a heater it will have to be wired. The heater may be wired to the internal receptacle or a separate junction box. If wiring the heater to the internal receptacle, thread the heater wires through the same knockout as the power wires. Connect the heater wires to the power wires with wire nuts (green to green, black to black, and white to white). 3 Replace the access panel. 4 Connect the wires from the transformer to the AC PWR/SOLAR terminal located on the control board. 5 Plug the transformer into the internal receptacle. 1 2 CHGR OVLD CTRL 4 AC PWR /SOLAR 5 3 EXTERNAL RECEPTACLE POWER WIRE (STRANDED COPPER WIRE) 500 feet or less 500 feet to 1000 feet Wire Gauge 14 - 500 feet (152 m) Wire Gauge 12 - 1000 feet (305 m) Transformer 13.5 Vac Transformer 14.5 Vac NOTE: All power wiring should be on a dedicated circuit, calculated using NEC guidelines. National and local electrical codes must be reviewed for suitability of wire installation. The transformer must be located in a dry location that is protected from weather conditions, such as inside the house or garage. 1 Run low voltage wire between the transformer and the operator. 2 Connect the wires from the transformer to the AC PWR/SOLAR terminal located on the control board. 3 Plug the transformer into the external receptacle. 15 CHGR OVLD CTRL 2 AC PWR /SOLAR 1 14.5 COM Vac 13.5 Vac 3
-
 1
1 -
2
-
3
-
4
-
5
-
6
-
7
-
8
-
9
-
10
-
 11
11 -
 12
12 -
 13
13 -
 14
14 -
 15
15 -
 16
16 -
 17
17 -
 18
18 -
 19
19 -
 20
20 -
 21
21 -
22
-
23
-
24
-
25
-
26
-
27
-
28
-
29
-
30
-
31
-
32
-
33
-
34
-
35
-
36
 |
 |
