Linksys NAS200 User Guide - Page 14
User Guide, Refresh, Close - windows 7
 |
UPC - 745883579150
View all Linksys NAS200 manuals
Add to My Manuals
Save this manual to your list of manuals |
Page 14 highlights
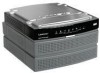
Chapter 2 2. Click Yes. Install Drive Mapping Utility 3. The Setup Wizard automatically installs the utility. Click OK. Drive Mapping Utility Installed 4. On the Shared Folder Mapping screen, select the appropriate Network Storage System. Configuration Using the Setup Wizard 9. The shared folder automatically opens in a separate window. Repeat steps 5-8 to map additional network drives. 10. To exit the utility, click Close on the Shared Folder Mapping screen. For more information about the utility, refer to "Chapter 4: Use". User Guide Click this option to access the pdf of this User Guide. Map Network Drive 5. Select the appropriate shared folder. If you do not see the folder you want, click Refresh. 6. Keep the default drive letter, or select a different letter from the drop-down menu. Then click Map. 7. Enter your information in the User Name and Password fields. Click OK. User Guide To install Adobe Reader, click Yes. To cancel, click No. Adobe Reader Login Screen 8. You are notified when the shared folder has been mapped. Click OK. Shared Folder Mapped Network Storage System with 2 Bays 10
-
 1
1 -
2
-
3
-
4
-
5
-
6
-
7
-
8
-
 9
9 -
 10
10 -
 11
11 -
 12
12 -
 13
13 -
 14
14 -
 15
15 -
 16
16 -
 17
17 -
 18
18 -
 19
19 -
20
-
21
-
22
-
23
-
24
-
25
-
26
-
27
-
28
-
29
-
30
-
31
-
32
-
33
-
34
-
35
-
36
-
37
-
38
-
39
-
40
-
41
-
42
-
43
-
44
-
45
-
46
-
47
-
48
-
49
-
50
-
51
-
52
-
53
-
54
-
55
-
56
 |
 |
