Linksys NAS200 User Guide - Page 8
Set up Second Drive, Configuration Using the Setup Wizard - manual
 |
UPC - 745883579150
View all Linksys NAS200 manuals
Add to My Manuals
Save this manual to your list of manuals |
Page 8 highlights
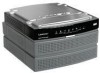
Chapter 2 2. For the public folder, keep the default drive letter, or select a different letter from the drop-down menu. Click Next. Configuration Using the Setup Wizard 5. The network drive(s) are mapped to your computer. Click Exit to exit the Setup Wizard, or click Next to return to the Welcome screen. Map Network Drive 3. To install the Linksys Network Drive Mapping Utility on your computer, click Yes. Install Drive Mapping Utility 4. The Setup Wizard automatically installs the utility. Click OK. Drive Mapping Utility Installed Network Drive Mapped The computer has been configured. Set up Second Drive NOTE: Make sure your second hard drive is a 3.5-inch, Serial-ATA (SATA) hard drive. If you plan to stripe (RAID 0) or mirror (RAID 1) your drives, then match the drive sizes for maximum drive use. WARNING: Low-profile or half-height hard drives can be used at your own risk; however, Linksys does not support the use of these drives as they are not securely held in place inside the Network Storage System. Follow the instructions to add a second hard drive to your previously configured Network Storage System. If you physically install a second drive without running the Setup Wizard, then the second drive will not be formatted. It will have to be manually formatted using the web-based utility (refer to "Chapter 3: Advanced Configuration"). Network Storage System with 2 Bays 4
-
 1
1 -
2
-
 3
3 -
 4
4 -
 5
5 -
 6
6 -
 7
7 -
 8
8 -
 9
9 -
 10
10 -
 11
11 -
 12
12 -
 13
13 -
14
-
15
-
16
-
17
-
18
-
19
-
20
-
21
-
22
-
23
-
24
-
25
-
26
-
27
-
28
-
29
-
30
-
31
-
32
-
33
-
34
-
35
-
36
-
37
-
38
-
39
-
40
-
41
-
42
-
43
-
44
-
45
-
46
-
47
-
48
-
49
-
50
-
51
-
52
-
53
-
54
-
55
-
56
 |
 |
