Linksys WET11 User Guide - Page 15
admin, Enter, Infrastructure, Ad-Hoc, Password, List of Bridges - ip address
 |
UPC - 745883552221
View all Linksys WET11 manuals
Add to My Manuals
Save this manual to your list of manuals |
Page 15 highlights
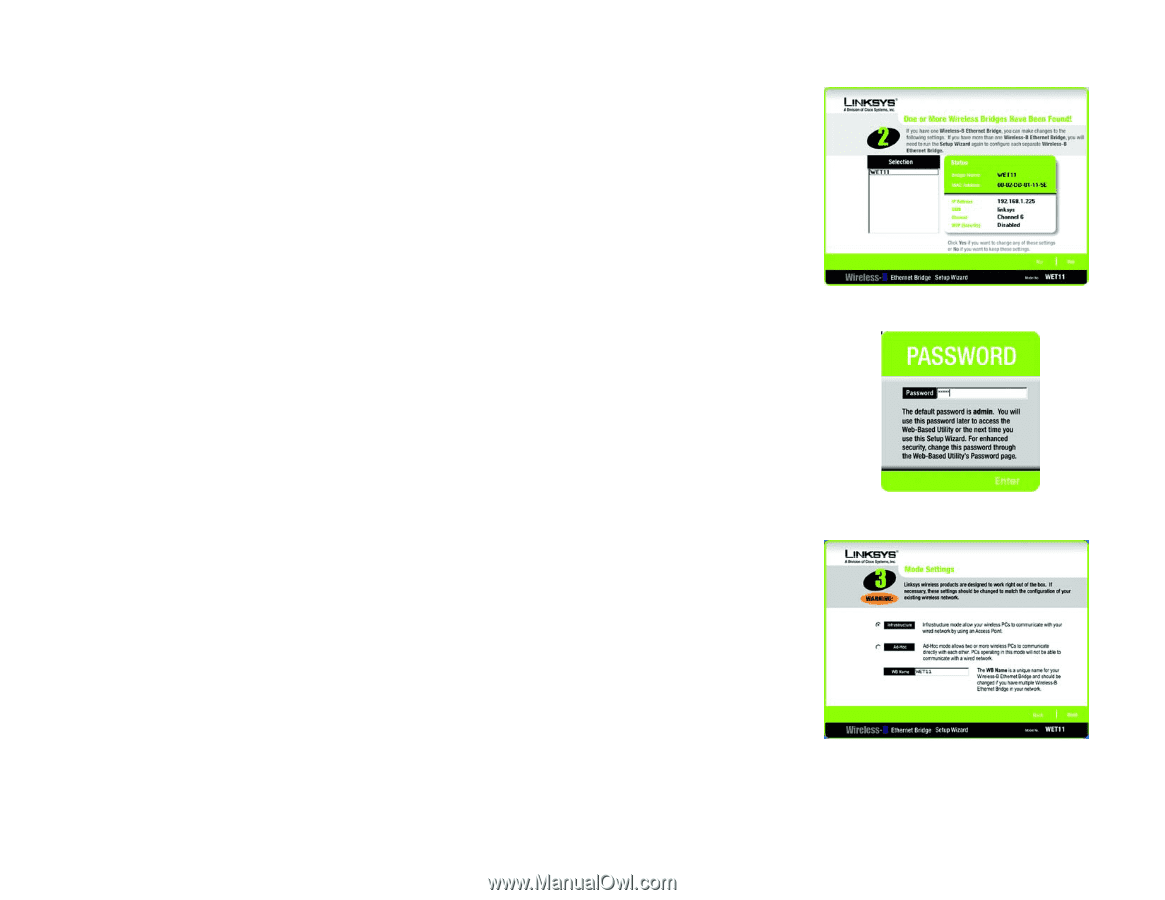
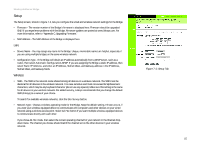
Wireless-B Ethernet Bridge 4. The screen shown in Figure 5-3 displays a list of Wireless-B Ethernet Bridges on your network, along with the status information for each Bridge. (If you have only one Bridge on your network, it will be the only one displayed.) Select the Bridge you are currently installing by clicking its name in the Selection box. Write down the IP address of the Wireless-B Ethernet Bridge, so you can use it to access the Web-based Utility later. Then click the Yes button. 5. For security purposes, you will be asked for your password in order to access the Bridge, as shown in Figure 5-4. In lowercase letters, enter admin in the Password field (later you can change the password through the Web-based Utility). Then click the Enter button. 6. The screen shown in Figure 5-5 shows a choice of two wireless modes. Click the Infrastructure radio button if you want your wireless computers to network with computers on your wired network using a wireless access point. Click the Ad-Hoc radio button if you want multiple wireless computers to network directly with each other. Do not use the Ad-Hoc mode if you want to network your wireless computers with computers on your wired network. In the WB Name field, enter a unique name for the Bridge. Memorable names are helpful, especially if you are using multiple bridges on the same network. Click the Next button to continue or the Back button to return to the previous screen. Figure 5-3: List of Bridges Figure 5-4: Password Chapter 5: Setting Up the Wireless-B Ethernet Bridge Setup Wizard Figure 5-5: Mode Settings 10
-
 1
1 -
2
-
3
-
4
-
5
-
6
-
7
-
8
-
9
-
 10
10 -
 11
11 -
 12
12 -
 13
13 -
 14
14 -
 15
15 -
 16
16 -
 17
17 -
 18
18 -
 19
19 -
 20
20 -
21
-
22
-
23
-
24
-
25
-
26
-
27
-
28
-
29
-
30
-
31
-
32
-
33
-
34
-
35
-
36
-
37
-
38
-
39
-
40
-
41
-
42
-
43
-
44
-
45
-
46
-
47
-
48
-
49
-
50
-
51
 |
 |